90-Minute Sandwich Rolls
This past weekend I asked my husband if he would make his hash browns and it turned into a whole day where I didn’t have to cook……… sort of. After many shopping trips which ended in laughter due to the various items he kept forgetting, I offered to make the MIA burger buns. The issue was, If we wanted to eat at a reasonable hour, I didn’t have much time for my typical recipe which requires 2 full-length proofs, equaling roughly 1.5 to 2 hours.
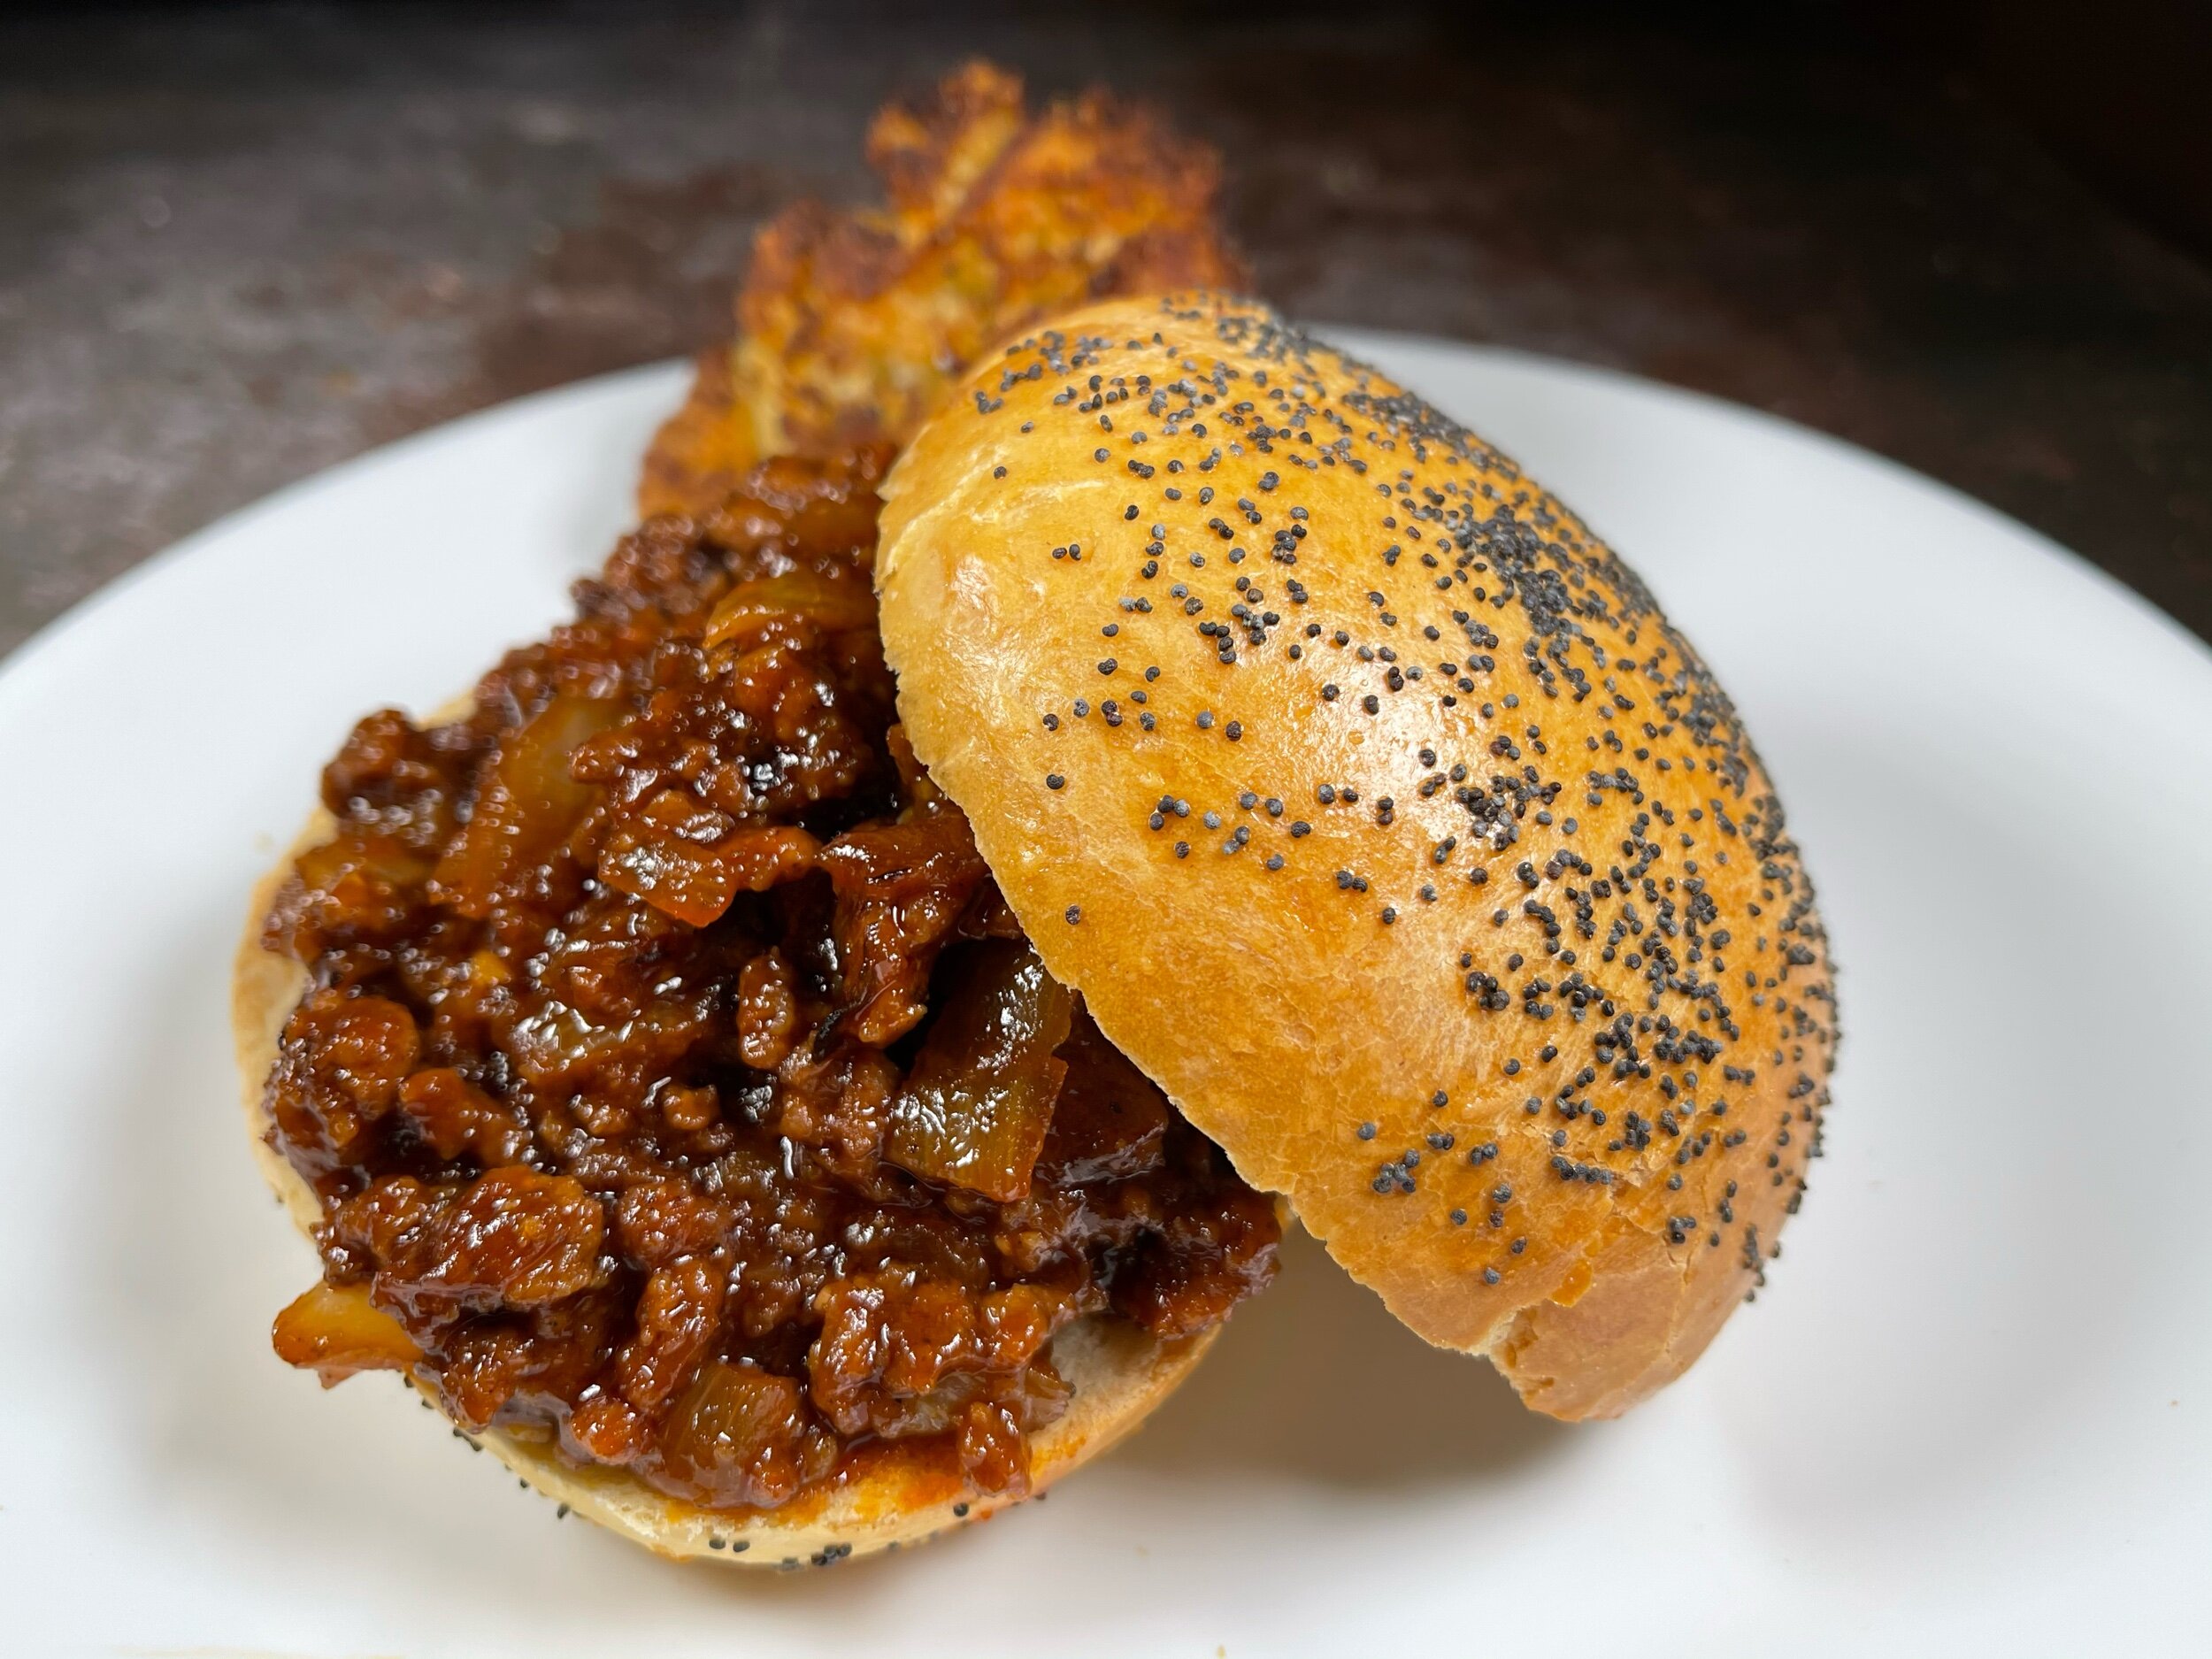
The thing is, put enough yeast in something and you can make things happen rather quickly, however, too much yeast doesn’t exactly taste good. The purpose of the first proof or “rise” is simply to build flavor. It’s why we “punch down” or deflate the dough before shaping and then let it rise again to get the air into it before baking. Because of the short time and my desire to not add sugar to the dough, I was a bit wary about the flavor potential. Many times hamburger buns and other enriched doughs have a bit of sugar, especially since enriched doughs take a bit longer to proof and sugar can give a need boost, I have good reason to want to leave it out. My husband’s “Sloppy Joe” mixture is wonderful and delicious, but it is full of sugar so it needed to be balanced with the roll it was put on. In the end, I needn’t have worried as the roll was very flavorful and paired beautifully with the Sloppy Joe mixture.
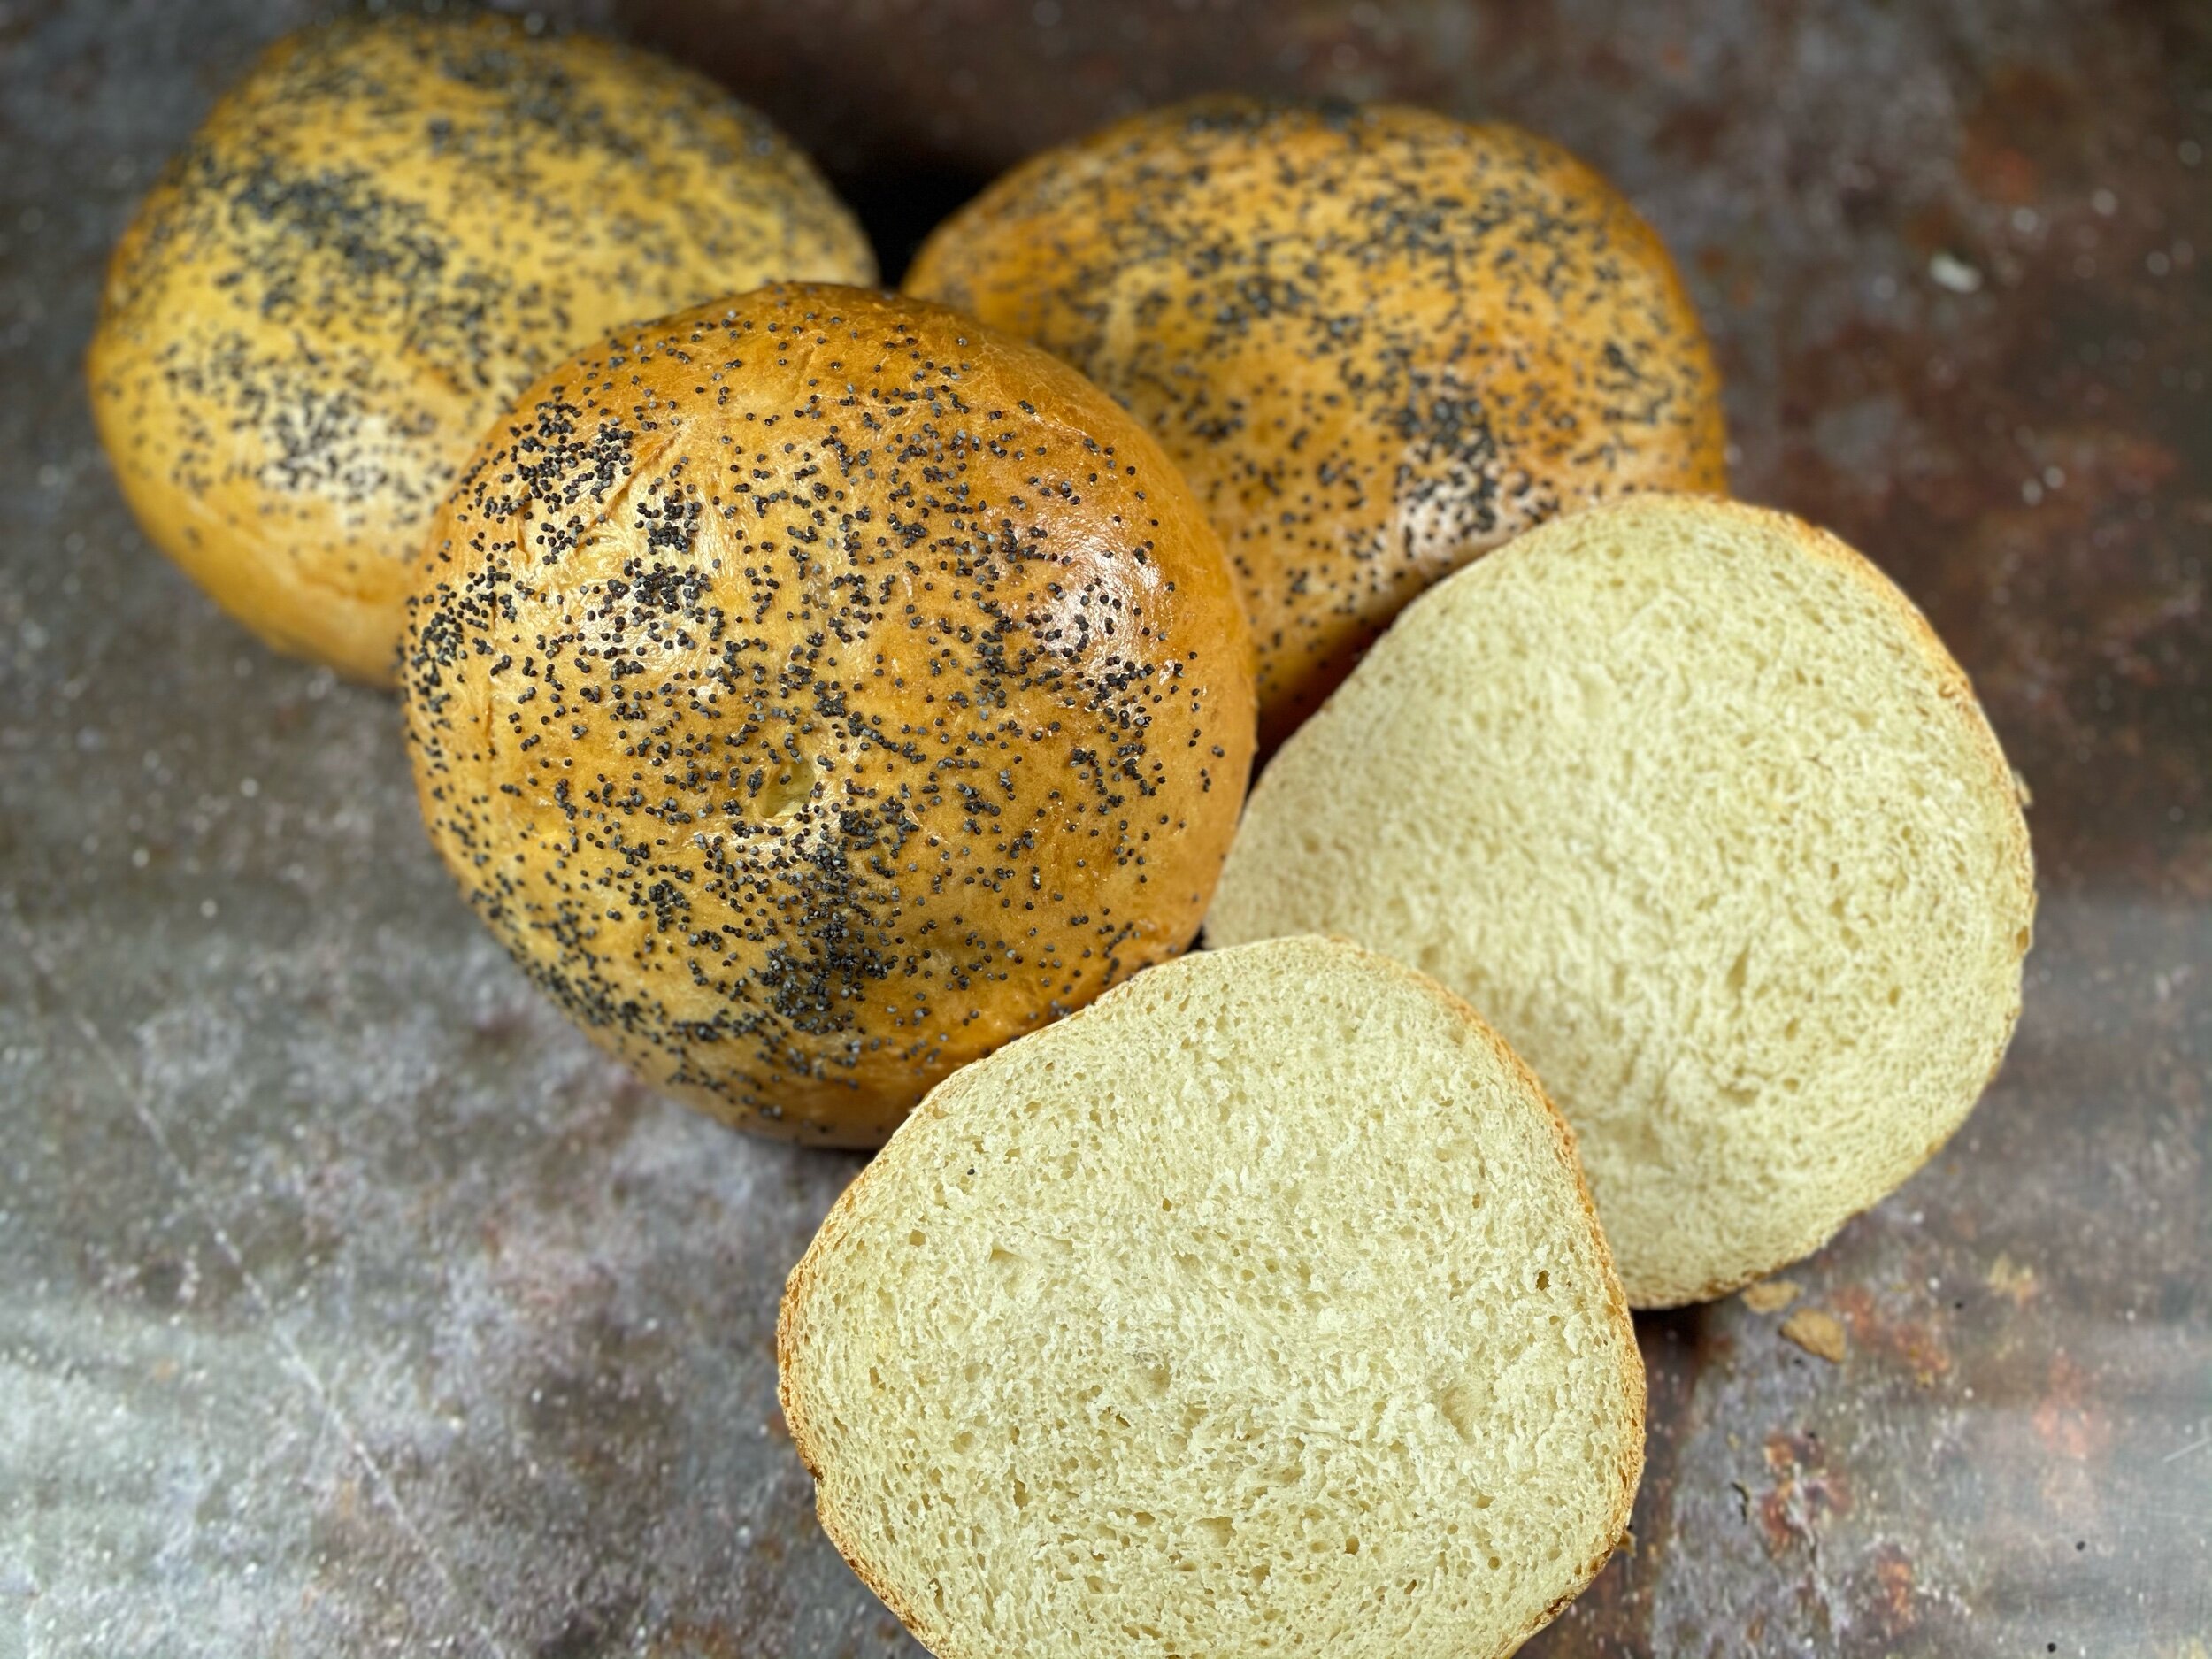
The steps of this recipe are fairly simple until you get to the shaping of the rolls. It would be great if you could simply “roll” them into a ball, and you can, technically, but it’s not going to make the nice shape of a typical roll. What is needed is surface tension. Now, we aren’t talking about the surface tension of water in science class, but rather the literal tension, or tautness, of the dough’s surface. Surface tension can impact bread in different ways but, insofar as the roll, it is needed to maintain its shape as well as the “oven spring,” which is the rising that takes place while the bread is cooking. Since it is easier to watch than try to explain the process, I included this short video link from Baking Mad’s Youtube channel as a quick reference.
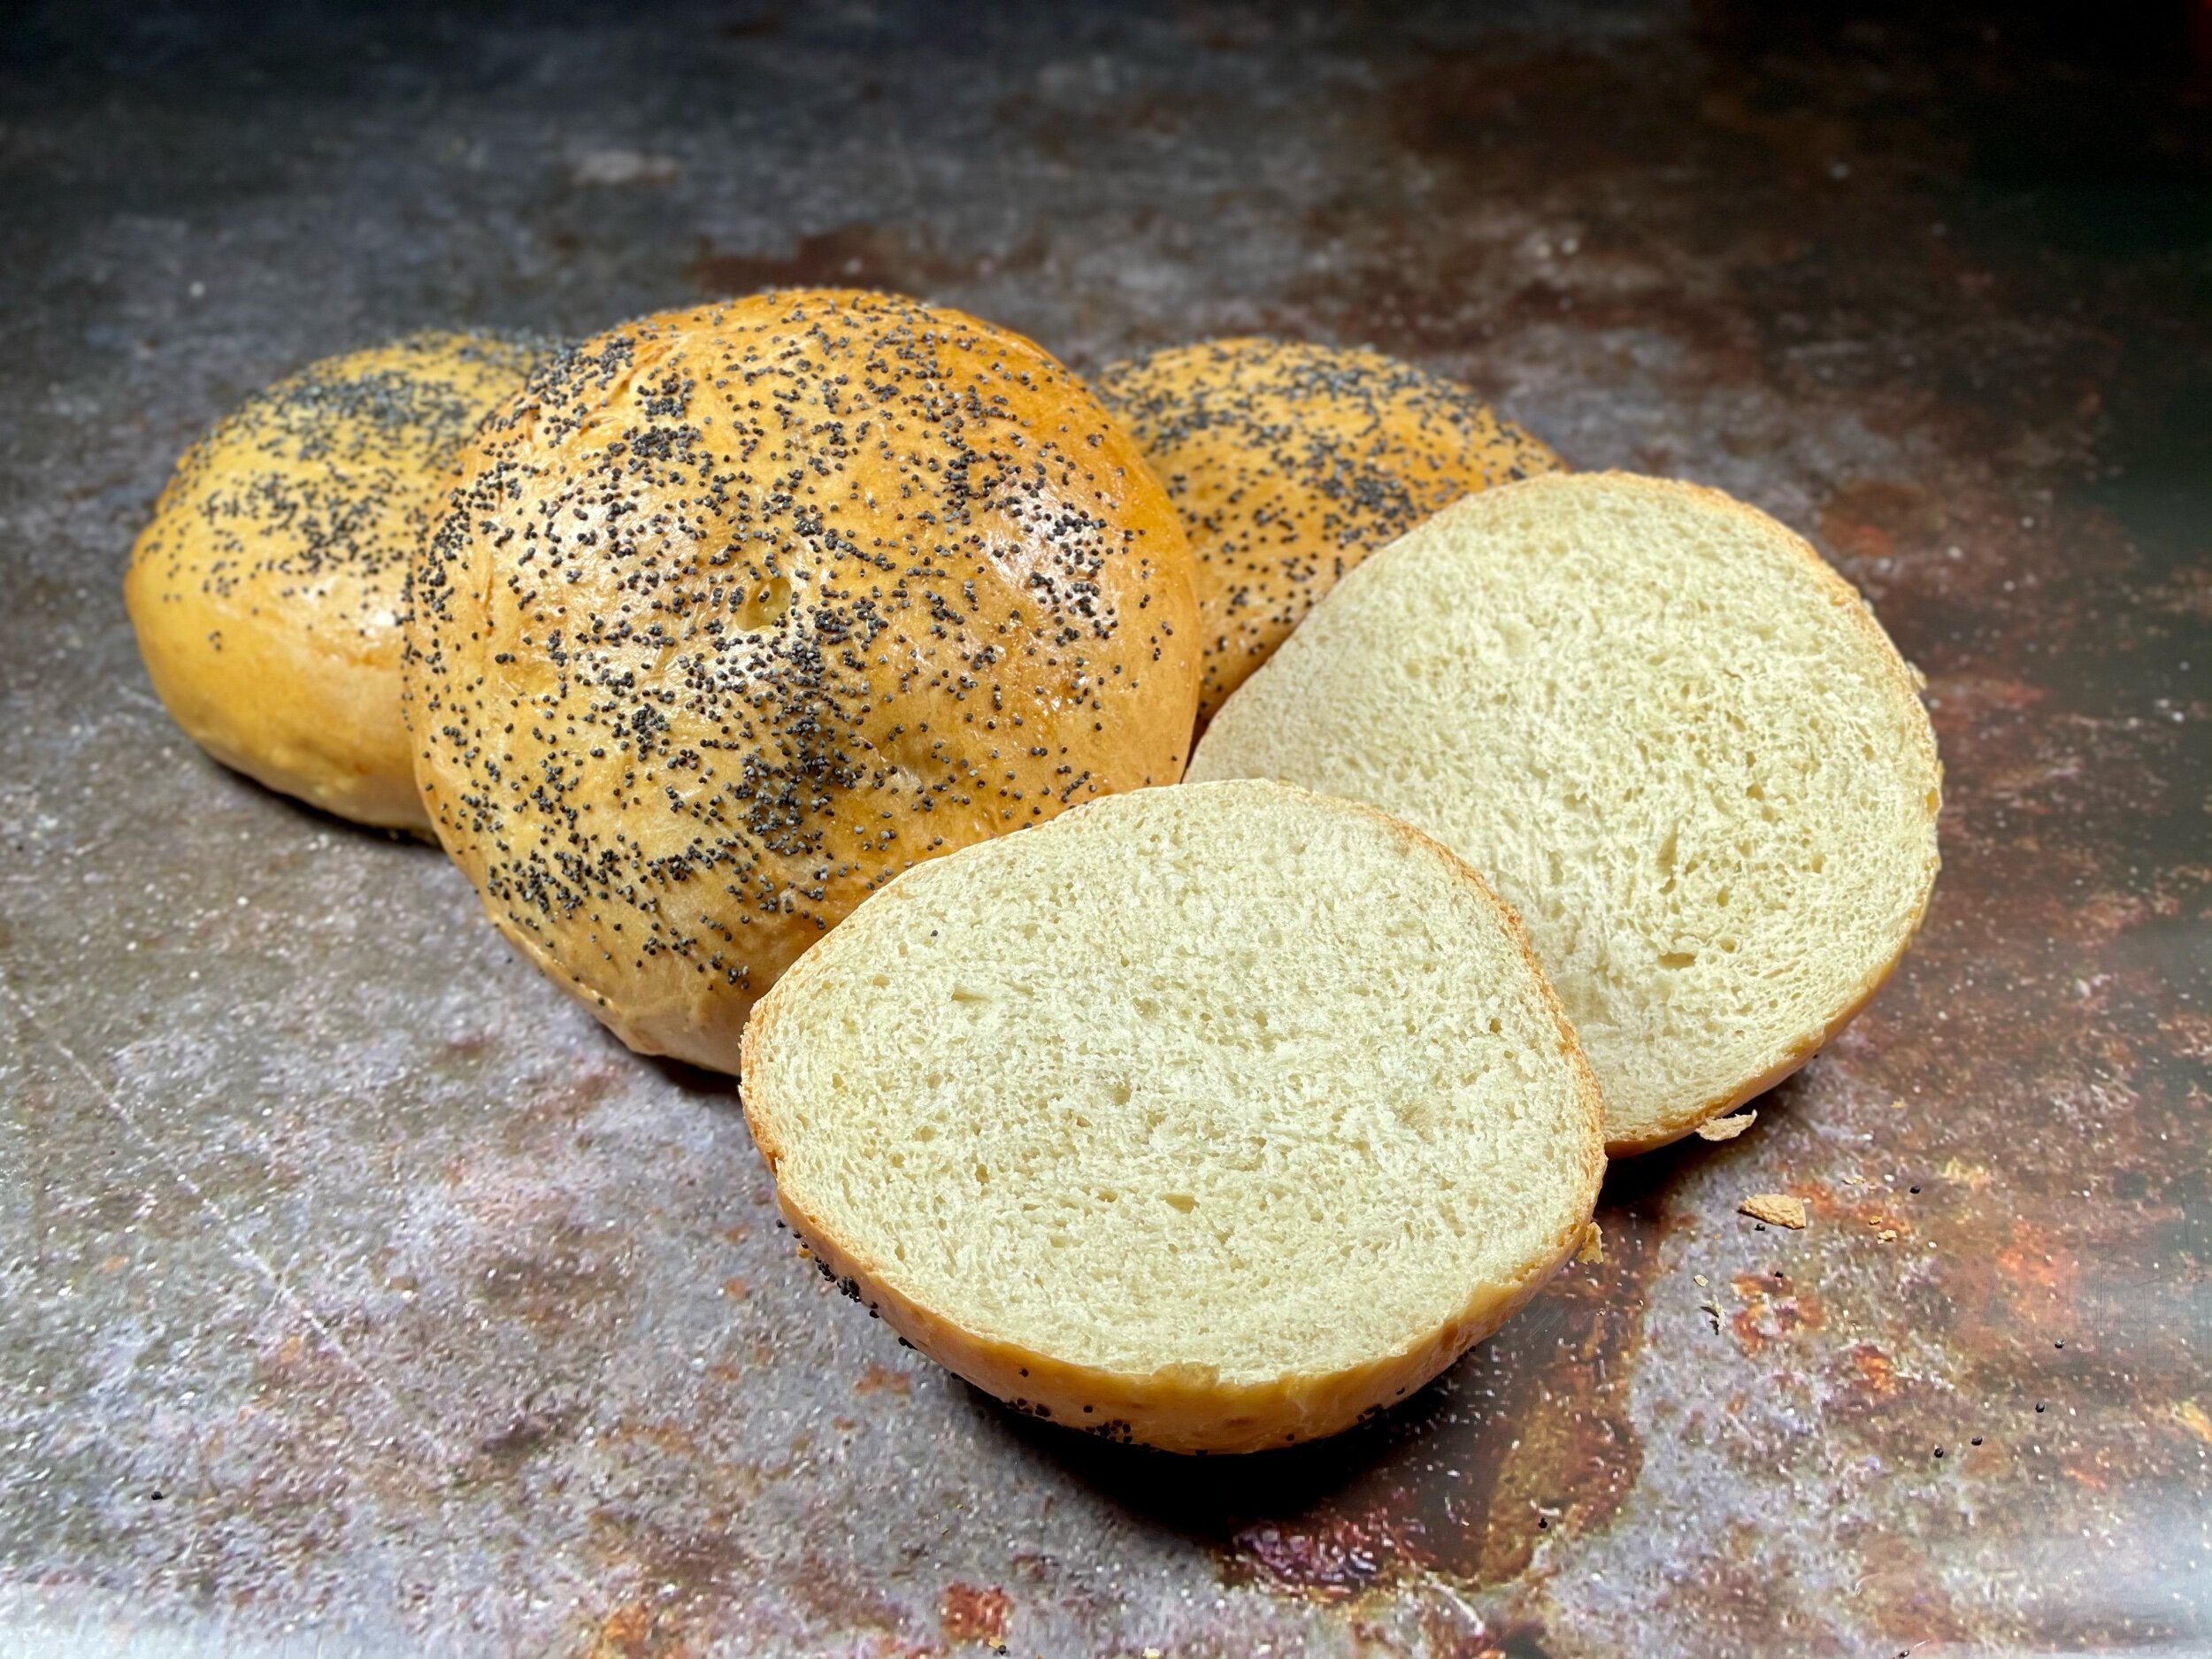
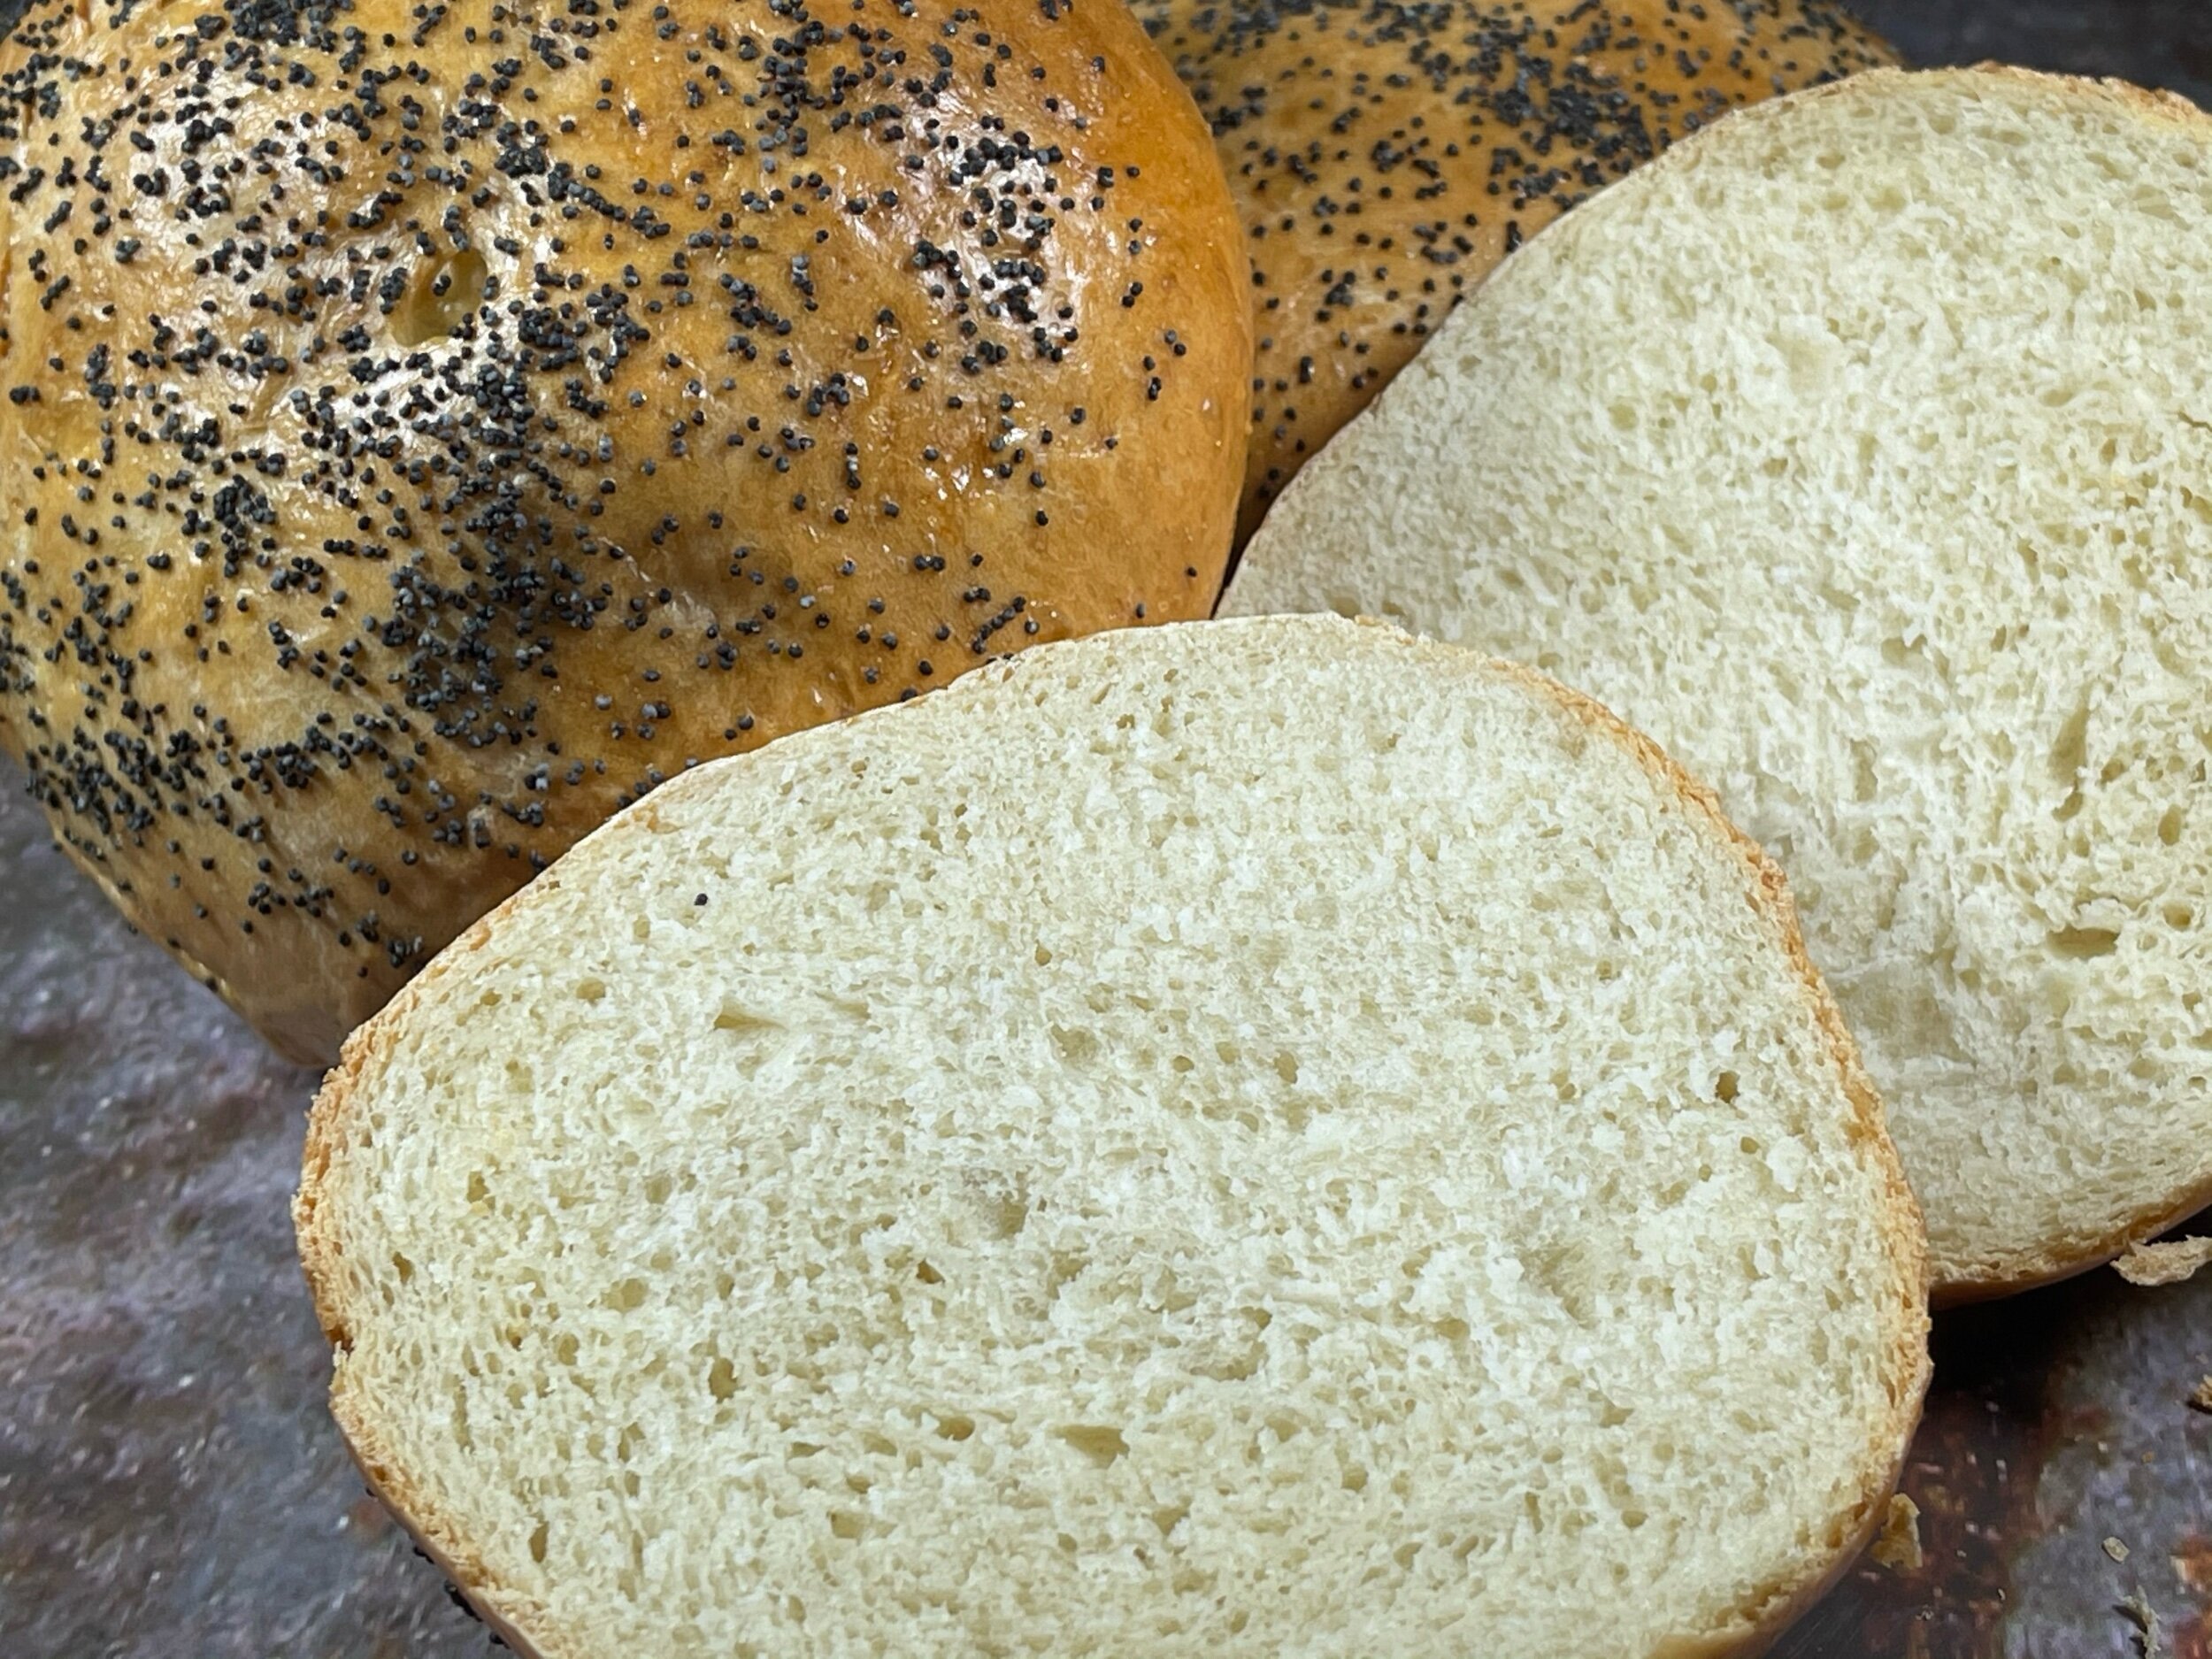
Before you put the rolls into the oven to bake, they need a bit of love by way of an egg wash. This is so they bake up nice and deep golden brown, but it’s also a place for some added flavor. I miss a good old sesame seed bun from my youth but alas I am allergic to them and every other seed with one exception, the poppy seed. Thankfully, the poppy seed is a perfect alternative as it gives a unique flavor as well as added crunch which aids in the texture complexity. However, if you wish, you can skip the toppings altogether or try other additives such as nigella seeds, za’atar, minced onion, or an everything bagel mix. However you top your roll, you’re sure to be enjoying a fresh roll after only 90 minutes.
Recipe Card
Note: I highly suggest having a digital scale in your kitchen. It takes the guesswork out and makes baking recipes a lot more successful. All of my recipes are written in metric weights. If you do not have a scale and need to convert a recipe or ingredient to volume, you can use the buttons to the right and copy /paste the recipe into the handy recipe conversion tool or the single ingredient conversion.

90 Minute Seeded Rolls
Ingredients
Method
- Measure out your flour into a large bowl (or the bowl for a stand mixer if you are using).
- Add the yeast and salt on top of the flour and give the flour a stir to distribute throughout.
- Add small blobs of the soft butter throughout the flour.
- Crack the egg into a small bowl sitting on top of a kitchen scale and add enough water to equal 200 grams.*
- Add the water/egg to flour.
- Mix the ingredients together with your hands, dough whisk or stand mixer fitted with the paddle, until the dough comes together.
- Tip the dough out into a clean surface and begin to knead the dough.
- Knead until the dough is smooth and elastic. By hand, kneading should take approximately 12-15 minutes. If you are using a stand mixer use a dough hook for 5-7 minutes.
- Form the dough into a ball, cover and let the dough rest for 15 minutes, in the warmest part of your kitchen, to allow the gluten strands to relax.
- Divide the dough into 4-6 equal pieces depending on how large you want your rolls to be.
- Shape the pieces into a ball by flattening the piece of dough and pull up the sides and attach to the center, pinching together, creating a round shape. This is creating surface tension for the roll. Once all the sides are gathers to the center and you have a rough ball shape place your hand on top of it and roll it around to smooth.
- Flip the balls over so the pinched center is facing down and place them on a parchment-lined baking sheet.
- After you shaped* all the rolls, press down on each to flatten them a bit and widen the circumference.
- Cover the dough with plastic wrap that has been sprayed with oil.
- Proof for 30 minutes in the warmest part of your kitchen. The buns should look noticeably bigger and puffy.
- Preheat your oven to 425° F or 400° F, fan assisted
- Whisk the egg and add a teaspoon of water to create an egg wash.
- Brush the egg wash on each roll and sprinkle your choice of seed on the top.
- Bake for 20 minutes until the tops are a nice golden brown.
- Cool and serve.
Notes:
- A large egg (in the US) is approximately 50 grams but it does vary. By weighing and adding the water to it will ensure the proper water content.
- When shaping the rolls if the dough is immediately springing back on you, not allowing it to flatten, rest it for a bit longer so the gluten strands can relax.
- Here is a helpful video for shaping rolls from the Baking Mad YouTube Channel