Root Vegetable Rose Tart

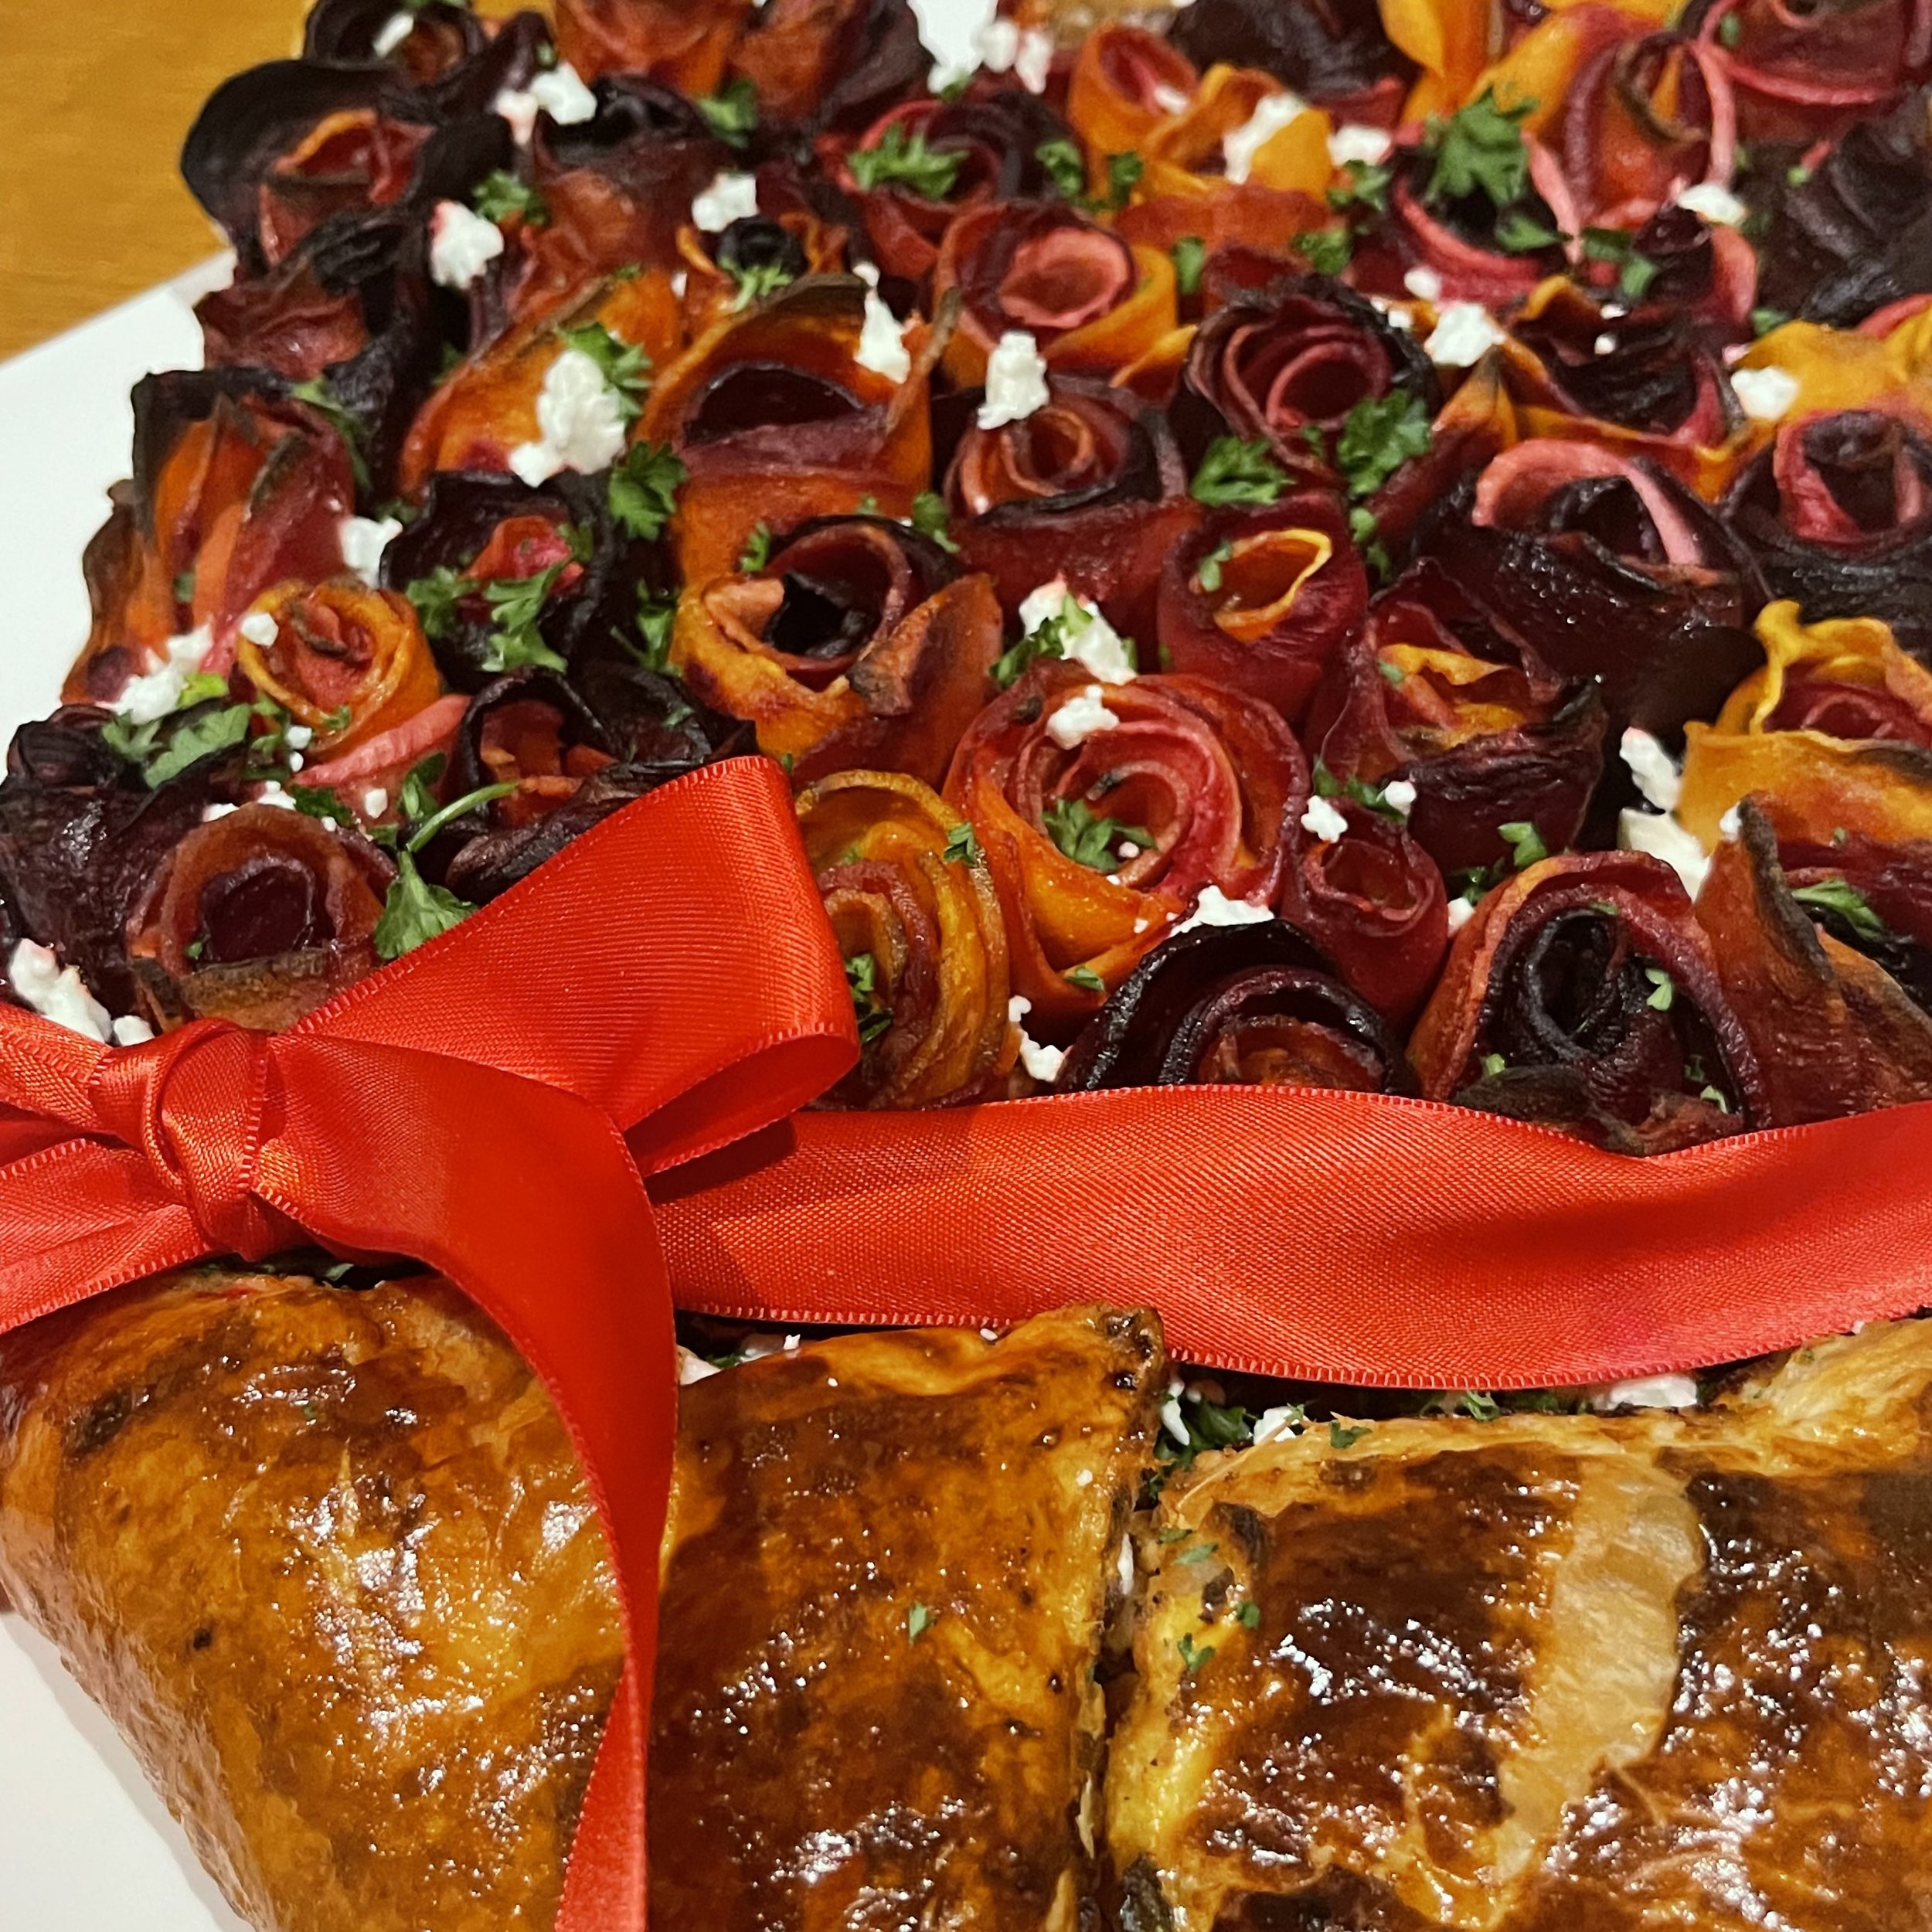
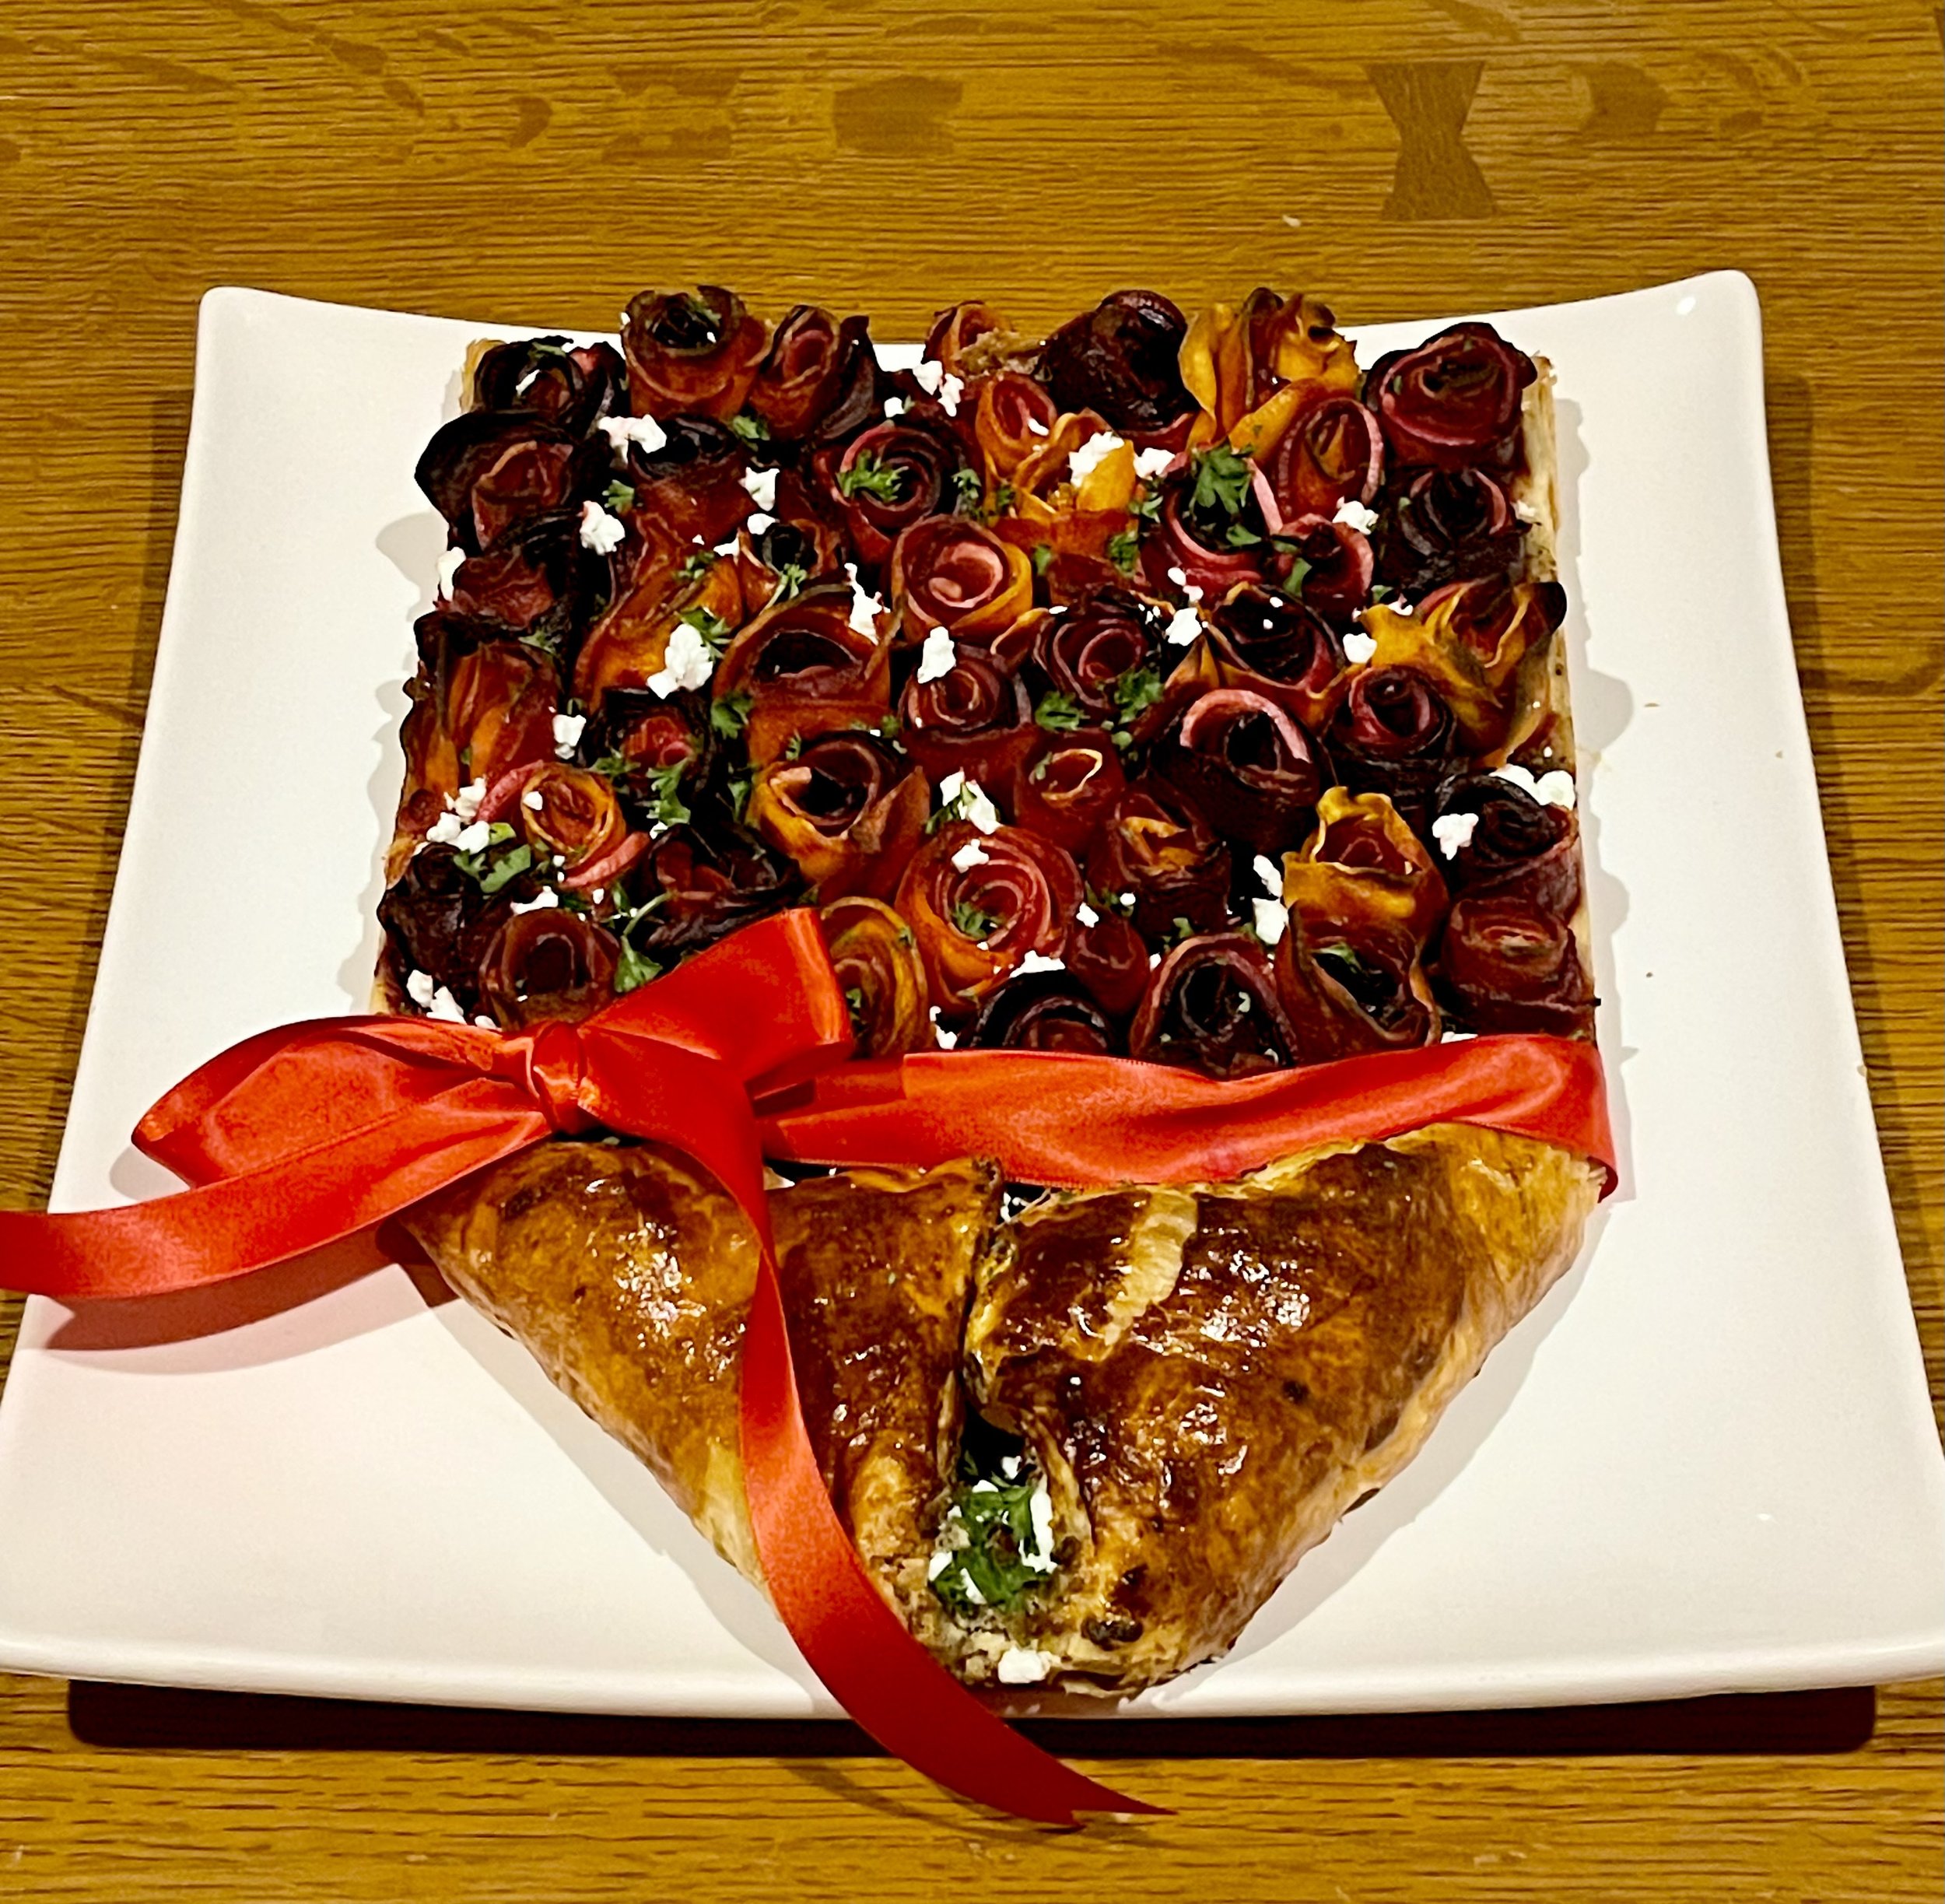
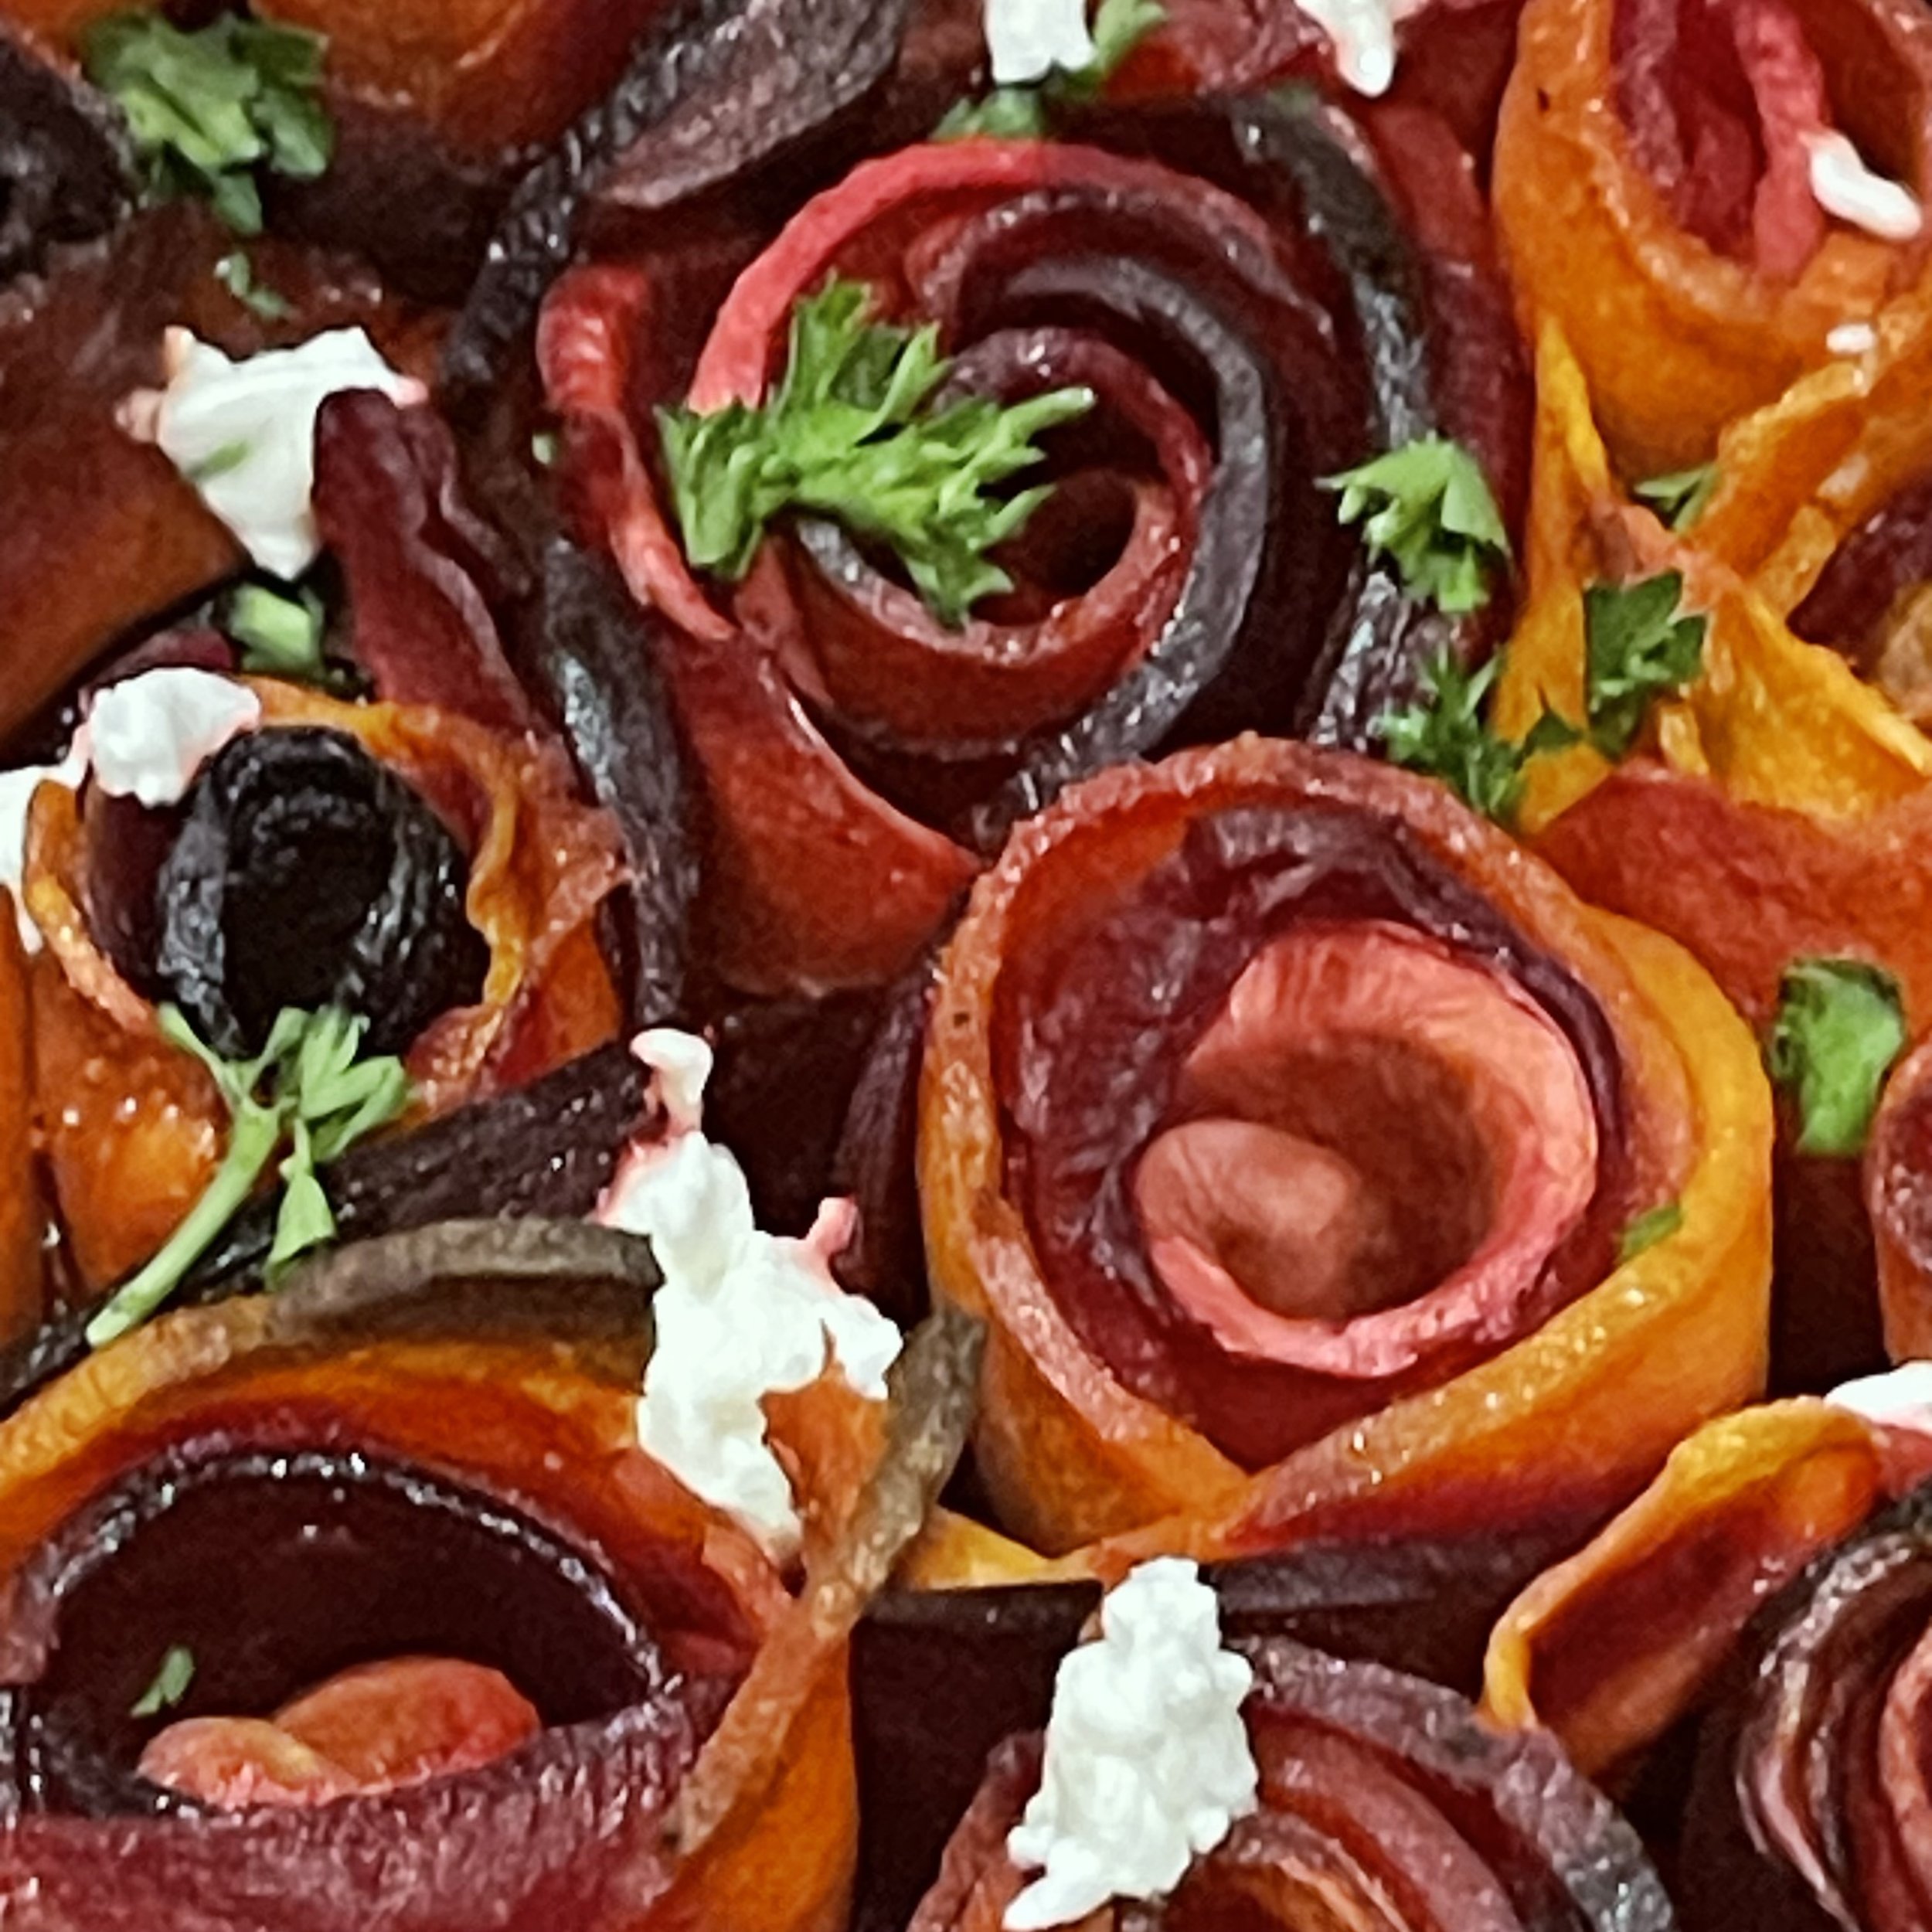
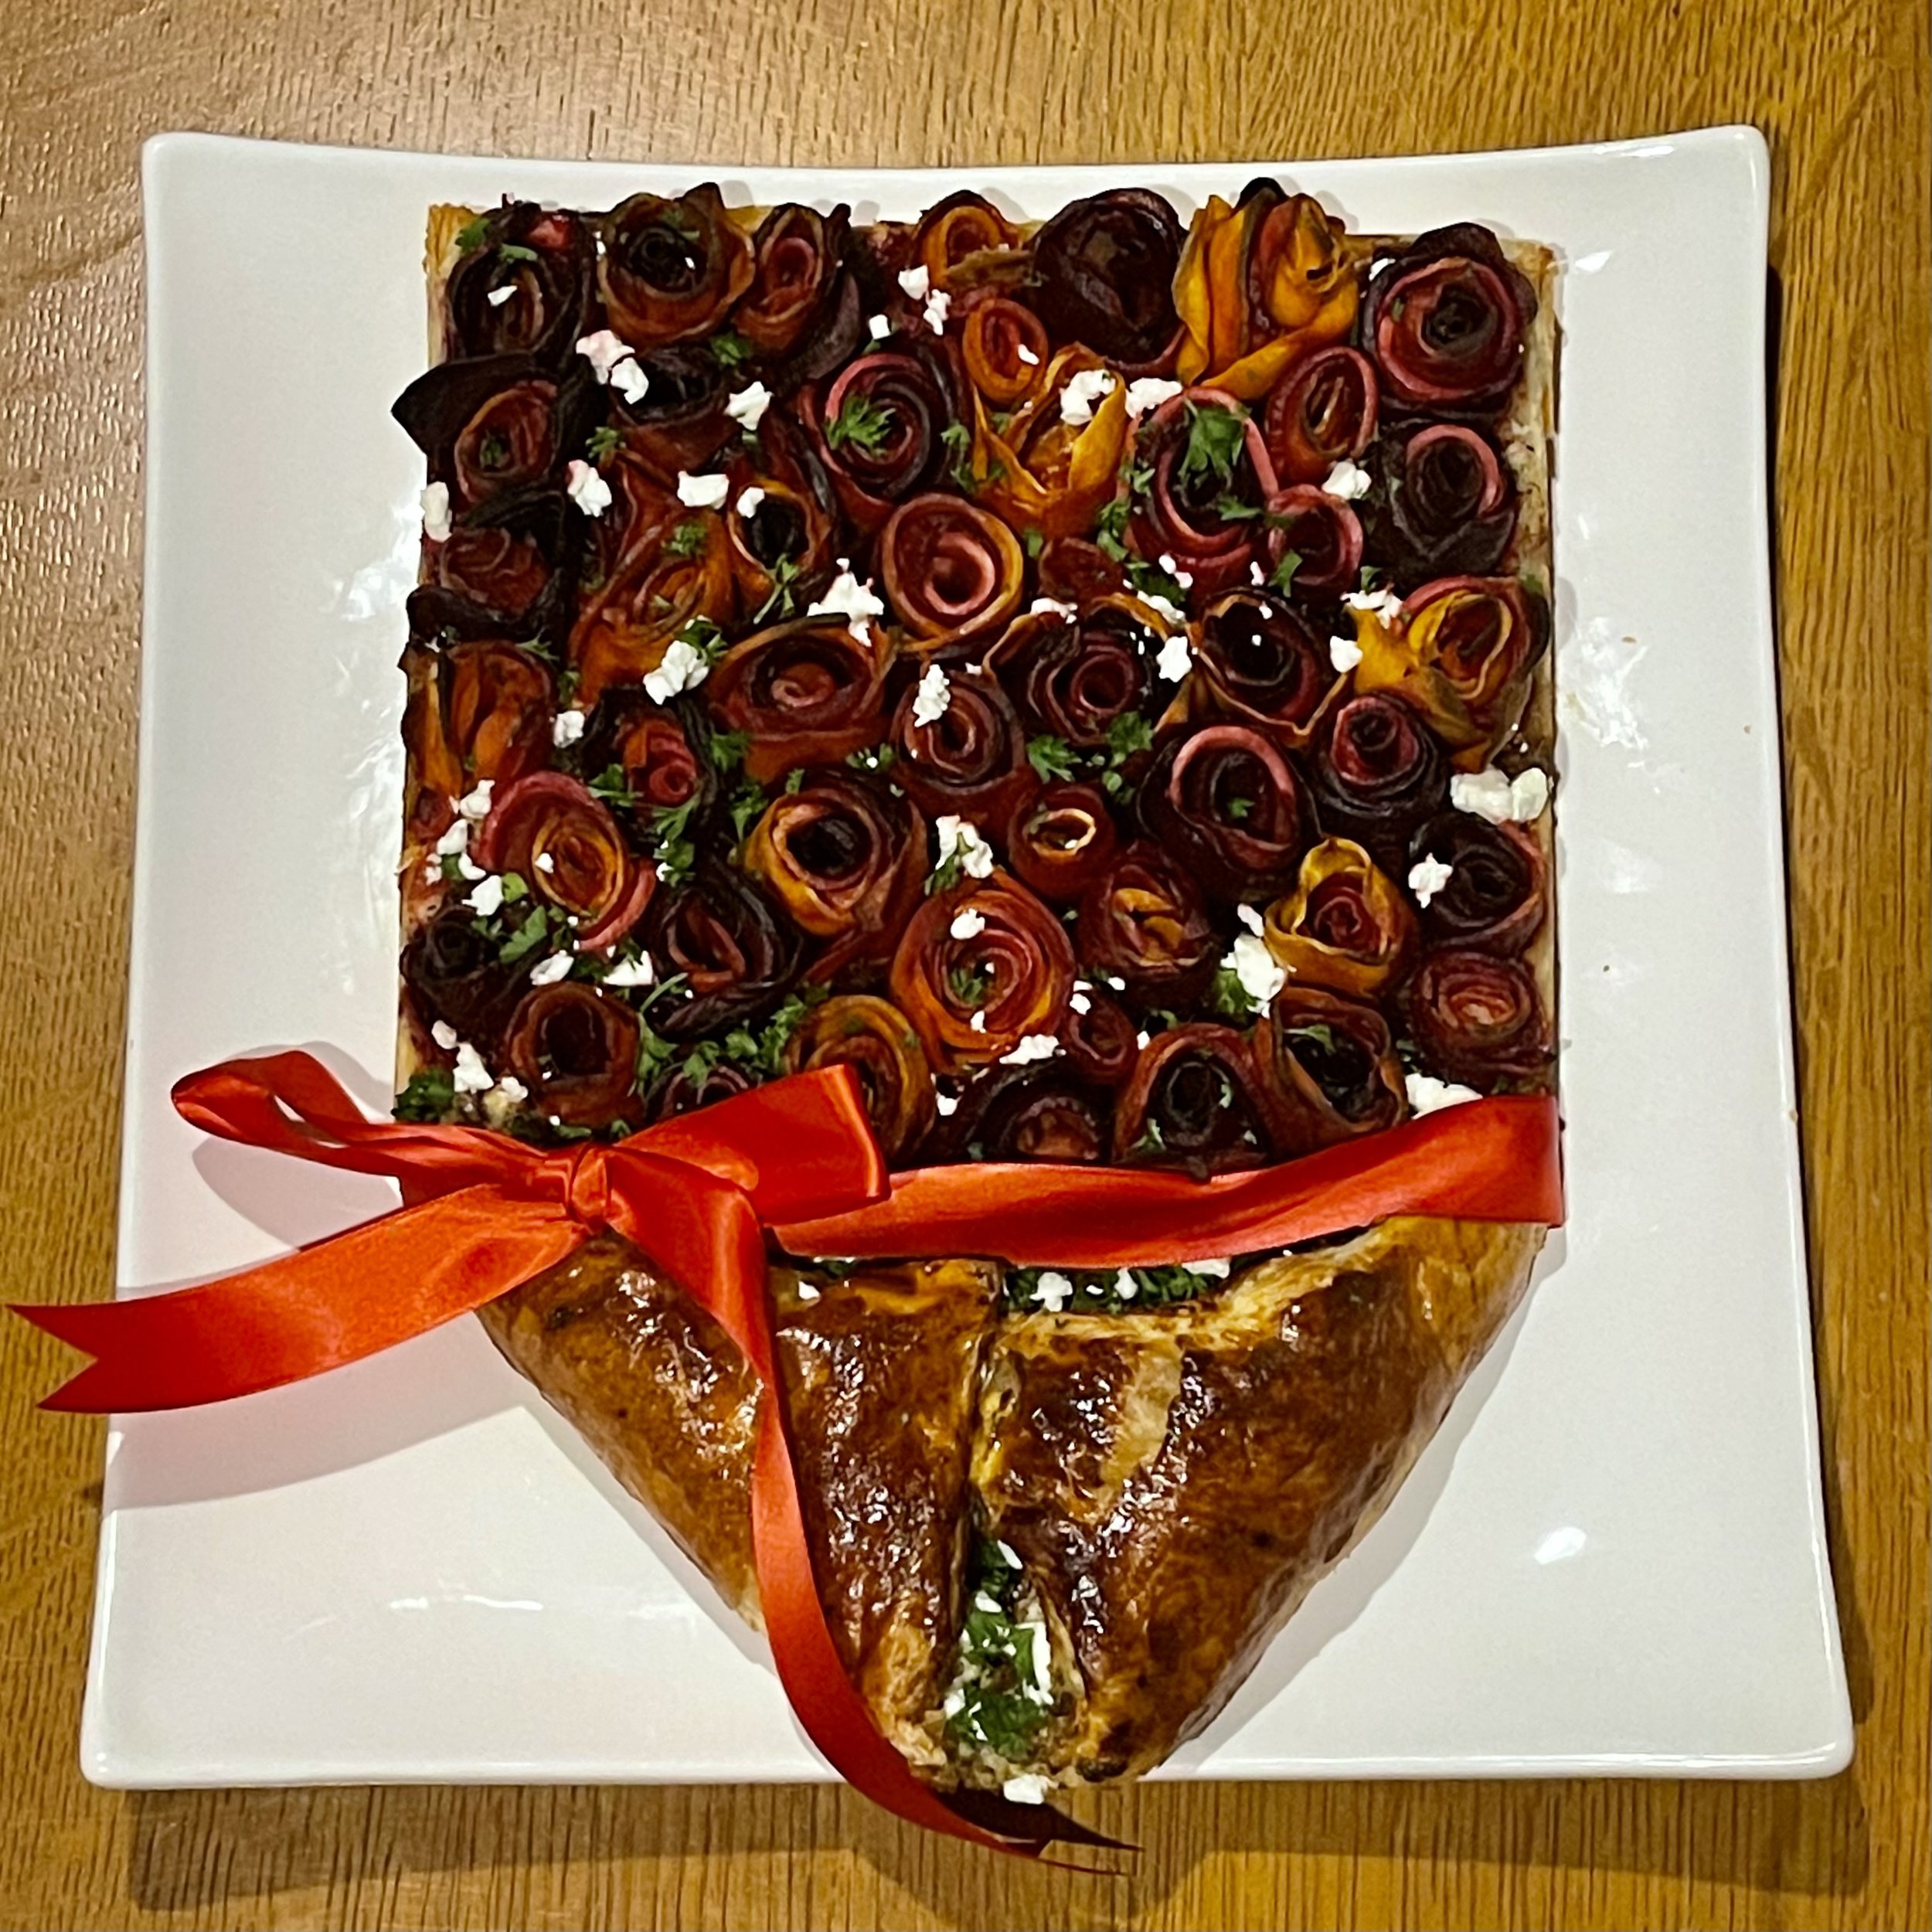
A while back I saw a tart with beet roses and it stayed rent-free in my head until such a time that I could create something using the concept. This past weekend our little one came down with a bug that completely wiped him. So this mama had to keep busy to avoid unnecessary worrying and I thought of the beet roses. I went to work creating a filling that I thought would pair well with various root vegetables and set out to fill up the sheet of puffed pastry I had laid out in my jellyroll tin. However, as I started assembling the rosettes I realized that I was far from filling the tin so I got creative, I rearranged the flowers and made the other half of the puffed pastry with the filling look like a cone for a bouquet.
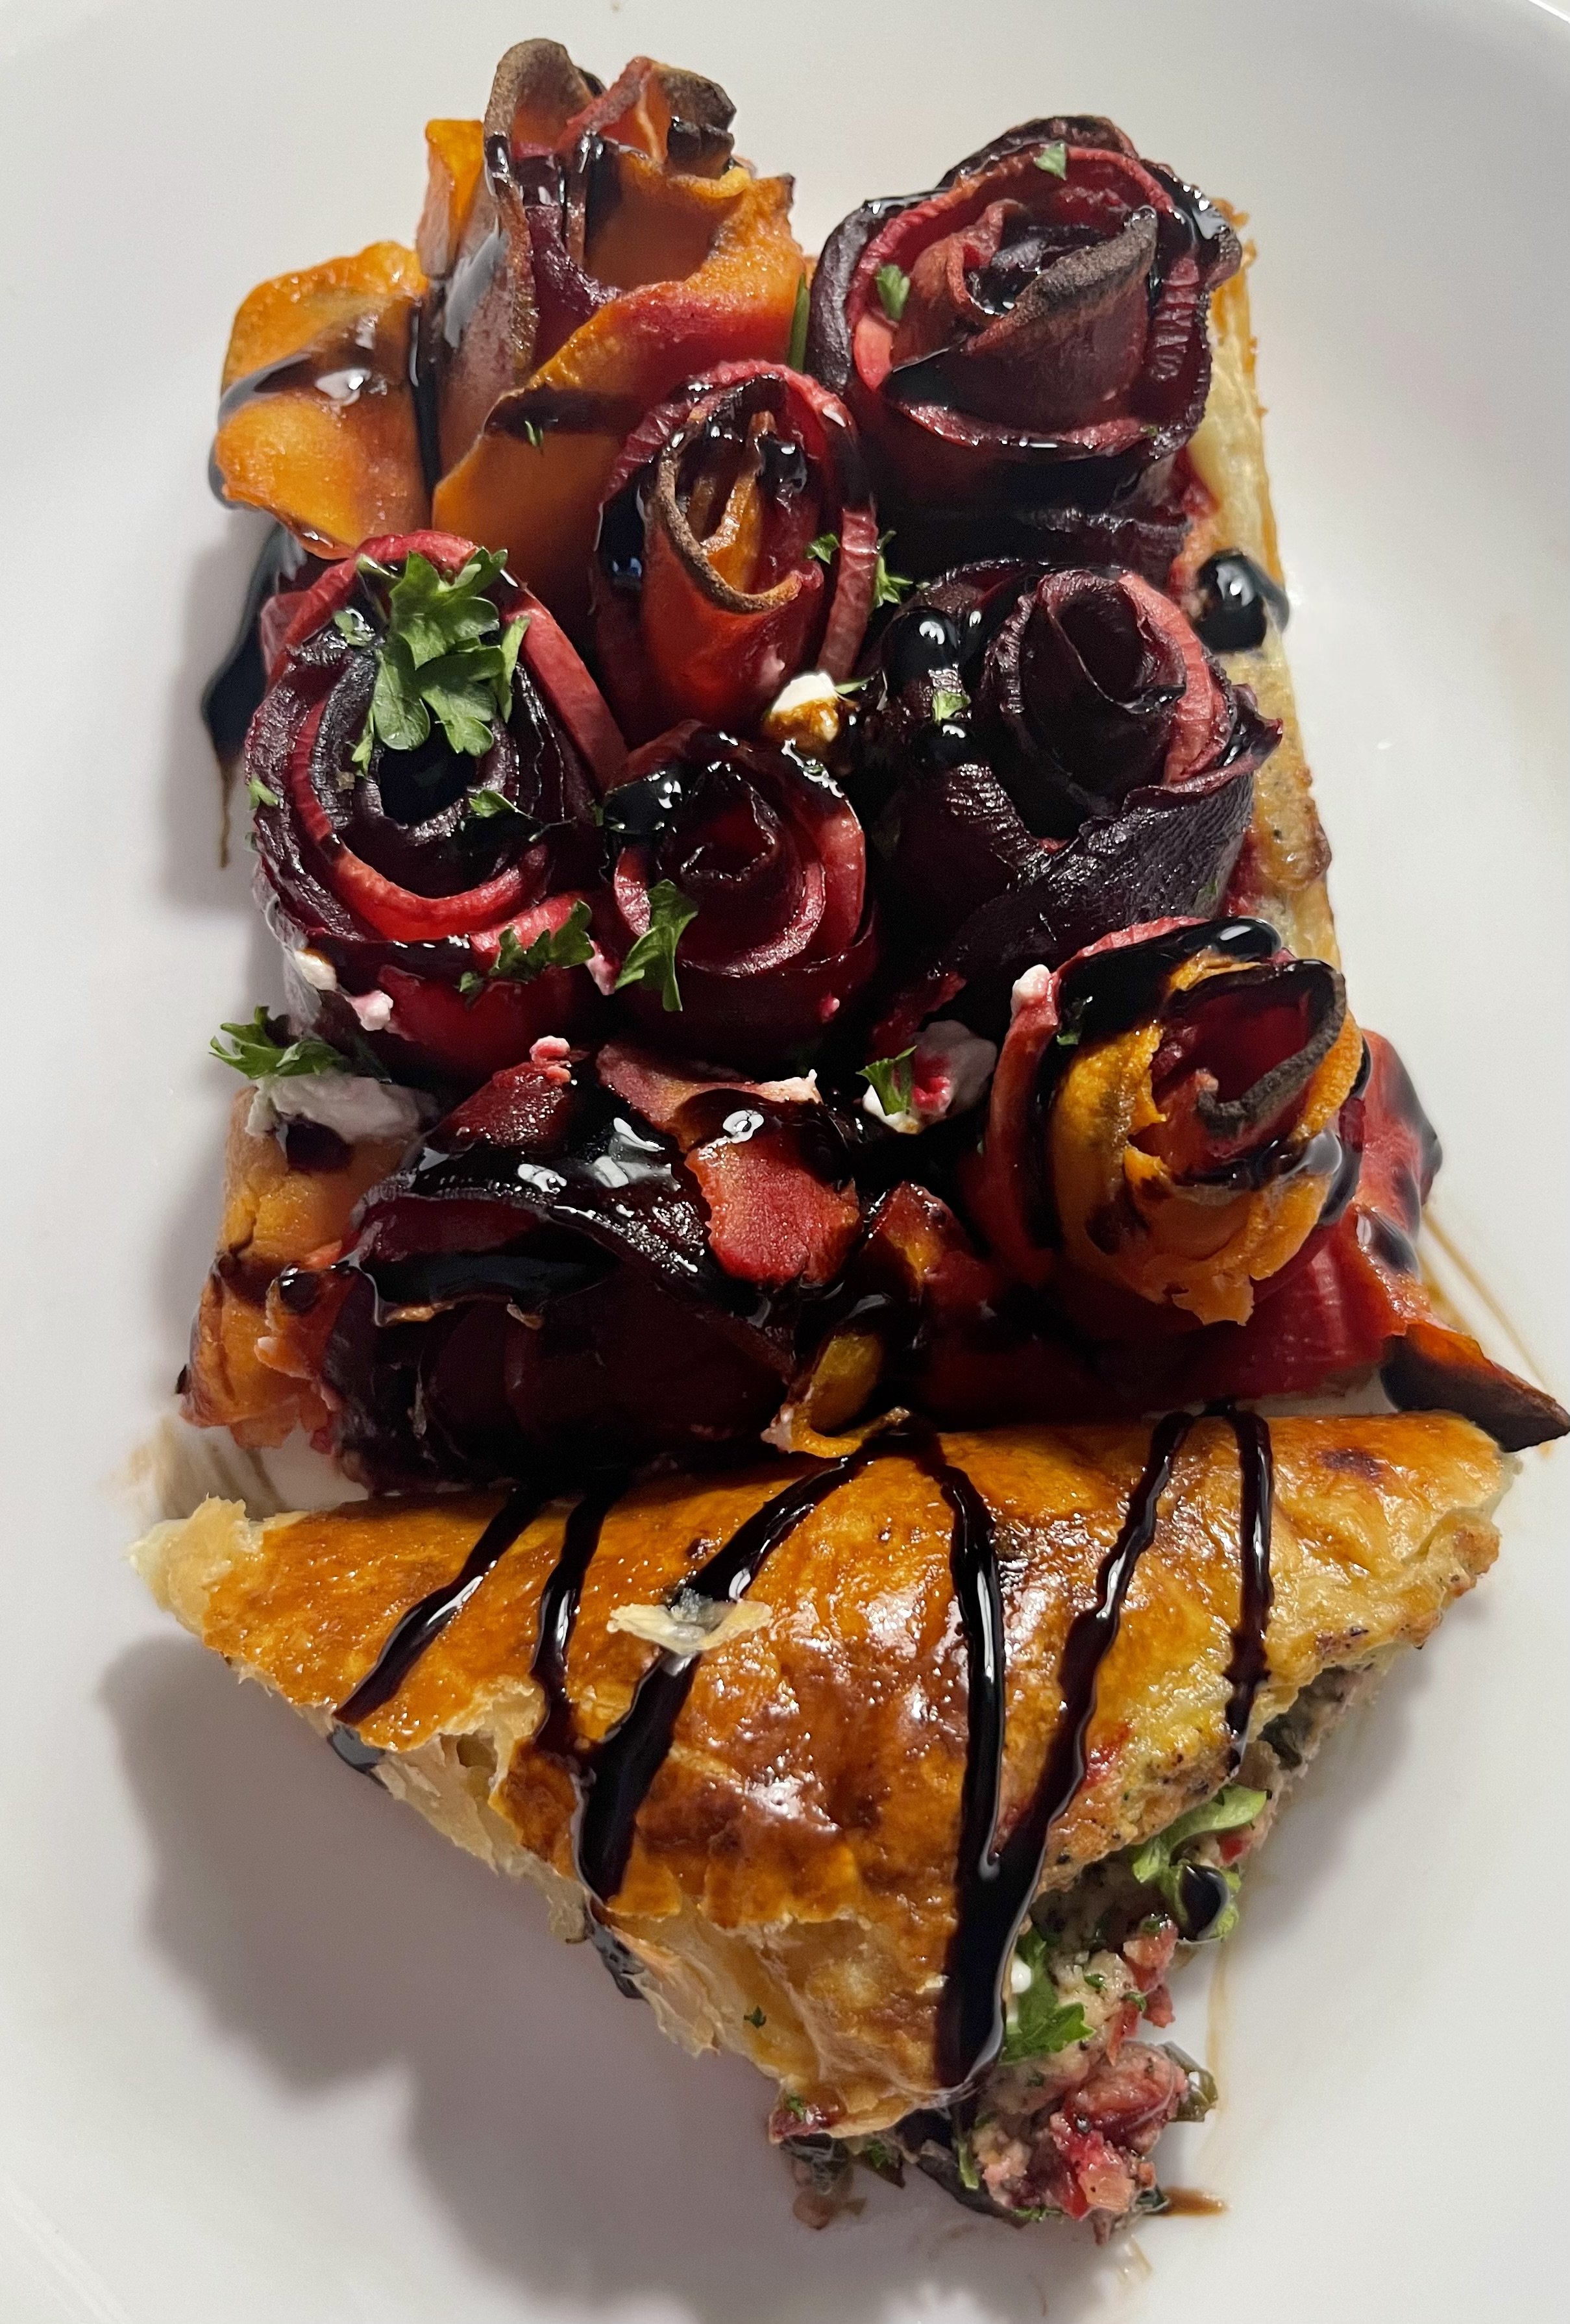
How I served a piece of the tart from both sections.
In the end, when I served slices of the tart, I gave each person a piece of that cone, which worked very well. It allowed for some additional texture of the crispy flakiness of the puffed pastry along with the soft sweet root vegetables. In wanting to continue with some artistic flair I added some goat cheese, and fresh parsley which elevated the flavors even more. While the bouquet of roses was fun and on-brand for February, it could easily be transformed into various sizes. Make individual tarts for both main courses or smaller ones for a side dish, or even in mini tart tins to have a single rosette for a stunning appetizer. The options are endless!
So yes, this does take a little more prep time than a typical recipe, but in reality, it did not take too long! Give it a try for your next date night or Valentine’s Day for that special someone in your life. Don’t have time to be making rosettes? Simply take the par-cooked slices of root veggies and lay them across the top of the filling! In the end, it is about the yummy food, not artistic flair!

Recipe Card
Note: I highly suggest having a digital scale in your kitchen. It takes the guesswork out and makes baking recipes a lot more successful. All of my recipes are written in metric weights. If you do not have a scale and need to convert a recipe or ingredient to volume, you can use the buttons to the right and copy /paste the recipe into the handy recipe conversion tool or the single ingredient conversion.

Root Vegetable Rose Tart
Ingredients
Method
- Peel the beets, turnips, and sweet potatoes.
- Take 5 of the beet greens and chop them into 1/2 inch pieces and set aside. Reserve the stalks and other leaves for another recipe. They freeze wonderfully.
- Slice the vegetables very thin into rounds. Using a mandolin is helpful for very thin slices as well as uniformity.
- Heat up a large skillet with a little olive oil and place in the slices. If you use red beets they will color the other vegetables. I arrange the slices in the skillet accordingly so they all get affected in different ways whilst preserving some in their natural color.
- Slice the larger rounds in half. Use your judgment for the smaller slices from the ends of the vegetables as they may not need to be cut.
- *Cover and cook until pliable, about 5-7 minutes.
- Remove 1 sheet of puffed pastry from the freezer to thaw.
- In a small bowl add the ricotta, parmesan, sumac, and 1 whole egg.
- Mix to thoroughly combine, cover, and set in the refrigerator
- After the vegetables are softened, remove them and set aside to cool. drizzle some olive oil in the same skillet and saute the shallots on medium heat until softened and translucent.
- Add the minced garlic and continue to cook for another 2 minutes, taking care to not burn the garlic. Add a touch more olive oil if needed.
- Add the beet greens and mix to combine with the shallots and garlic.
- Add the sherry to the hot skillet and keep the mixture moving in the pan as the alcohol reduces for about 2-3 minutes.
- Set aside to cool.
- Lightly flour a clean flat surface to roll out the puffed pastry.
- Place the thawed dough sheet onto the prepared surface and roll it out to roughly 14" X 10" rectangle.
- Place dough into a 13" X 9" jellyroll tin letting the excess come up onto the sides of the tin. Alternatively, you can use a 9" X 9" pan or the dough can be cut into 6 equal portions and placed in individual tart tins or freeform small rectangles with the sides folded up to resemble small pans.
- Using a silicon brush or the back of a teaspoon paint the top of the pastry with the Dijon mustard.
- Spoon and spread the ricotta mixture over the mustard into a smooth equal layer.
- Take the shallot mixture and sprinkle evenly on top of the cheese mixture.
- Place each rosette (instructions to follow) onto the puffed pastry making sure to lightly push them into the filling.
- Fill up half the party with the rosettes. Make sure to evenly space them without leaving gaps so everything evenly cooks.
- Take each corner and fold them diagonally up towards the rosettes. Secure the seam where the triangles come together.
- Place in the refrigerator for 20 or more minutes to chill the pastry for a better puff.
- Remove from the refrigerator and brush the pastry with an egg wash made from the egg yolk and a teaspoon of water.
- Bake the tart at 425℉ for 40 minutes. Lightly cover the top with foil if the vegetables are getting too dark after 25 minutes of baking.
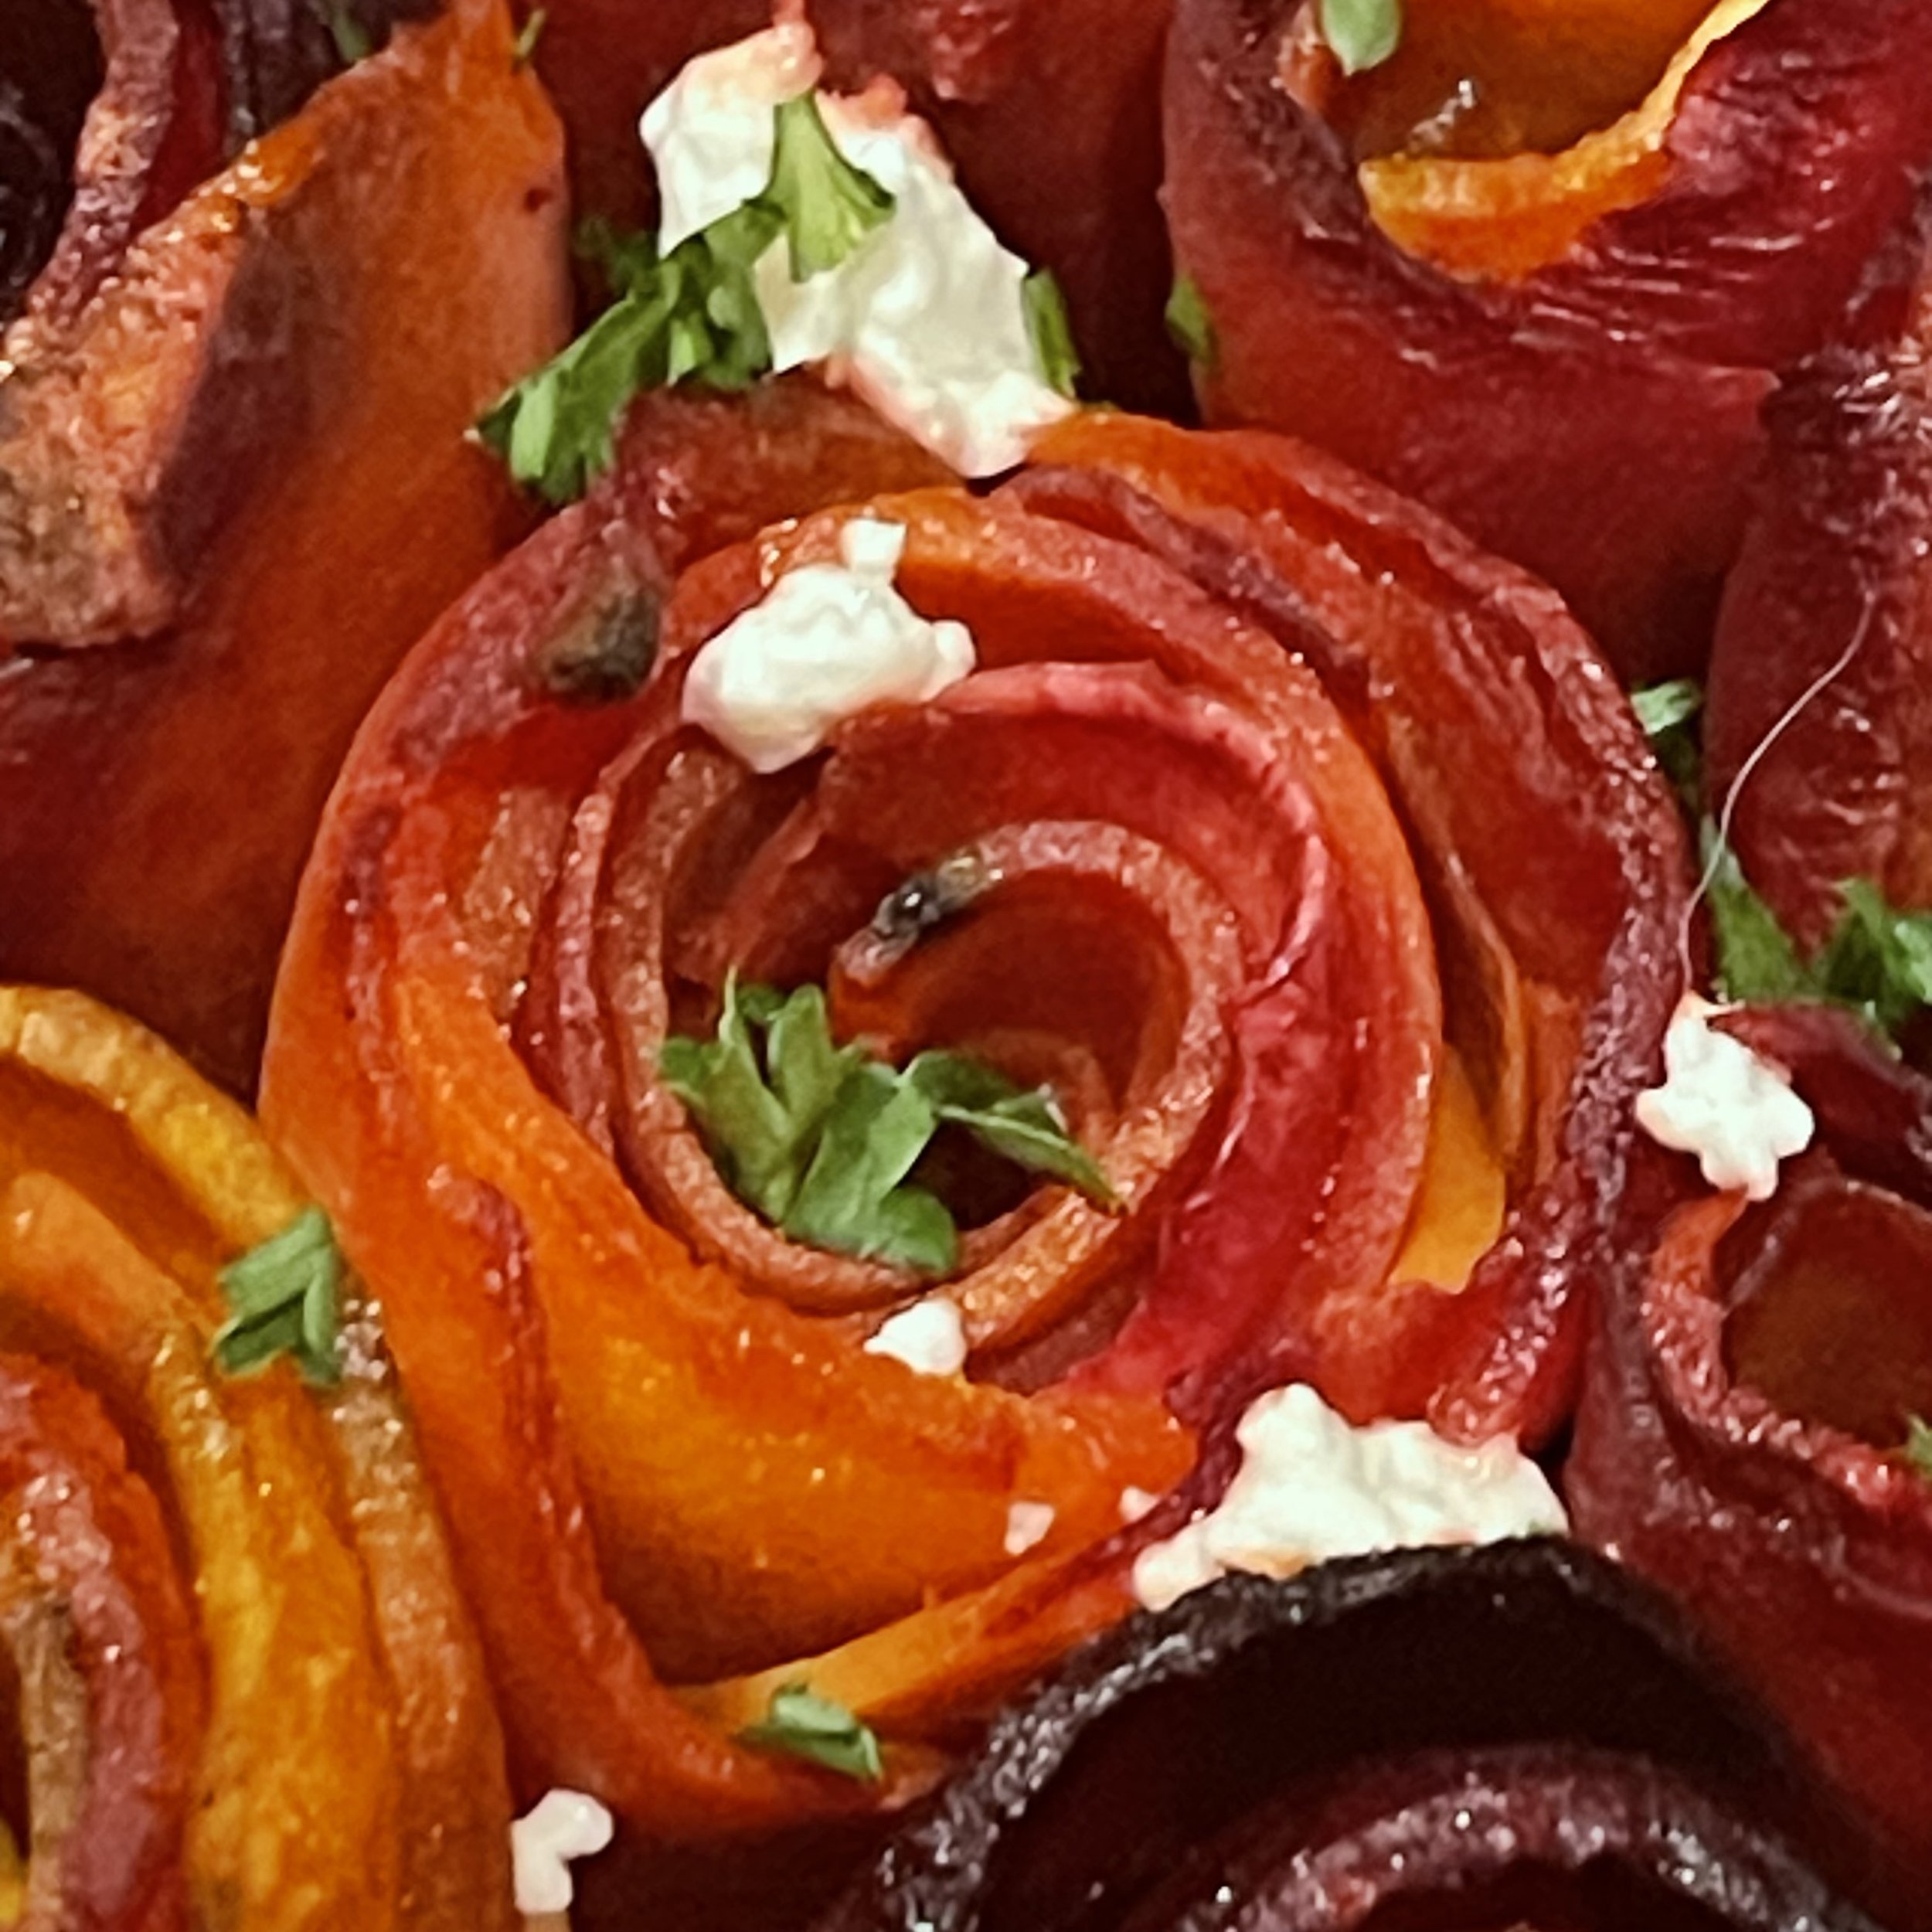
- Garnish with small bits of goat cheese, fresh parsley, and drizzle a balsamic glaze or reduction for both a stunning visual as well as flavor boast.
- Cut and serve as soon as it comes out of the oven. If you make it as the bouquet, I served a portion with the rosettes as well as a small piece of the "cone" with just the filling and pastry.
- Take one of the half-round slices and roll it up into a small cone.
- Take another slice and wrap it around the cone
- Keep adding slices, take care to overlap the previous seam slightly.
- Add slices to make the rosettes as big or small as you like.
- I prefer to make them different sizes using different colors of the vegetables. make small buds if you need to fill in any gaps.
- When you place the rosettes into the tart filling you can open up the bud a little bit. If you do open them up, be sure to leave a little more room to do so.
* Notes (if you see an * please check here)
*You can use full or reduced-fat ricotta cheese according to your preferences.
*You can use the microwave to soften the slices if needed.
*You can omit the sherry if needed and replace it with 1/2 the amount of water or swap it with white wine.
*Make sure to chill the assembled tart for a minimum of 40 minutes or up to 15 hours, covered with foil or cling film.