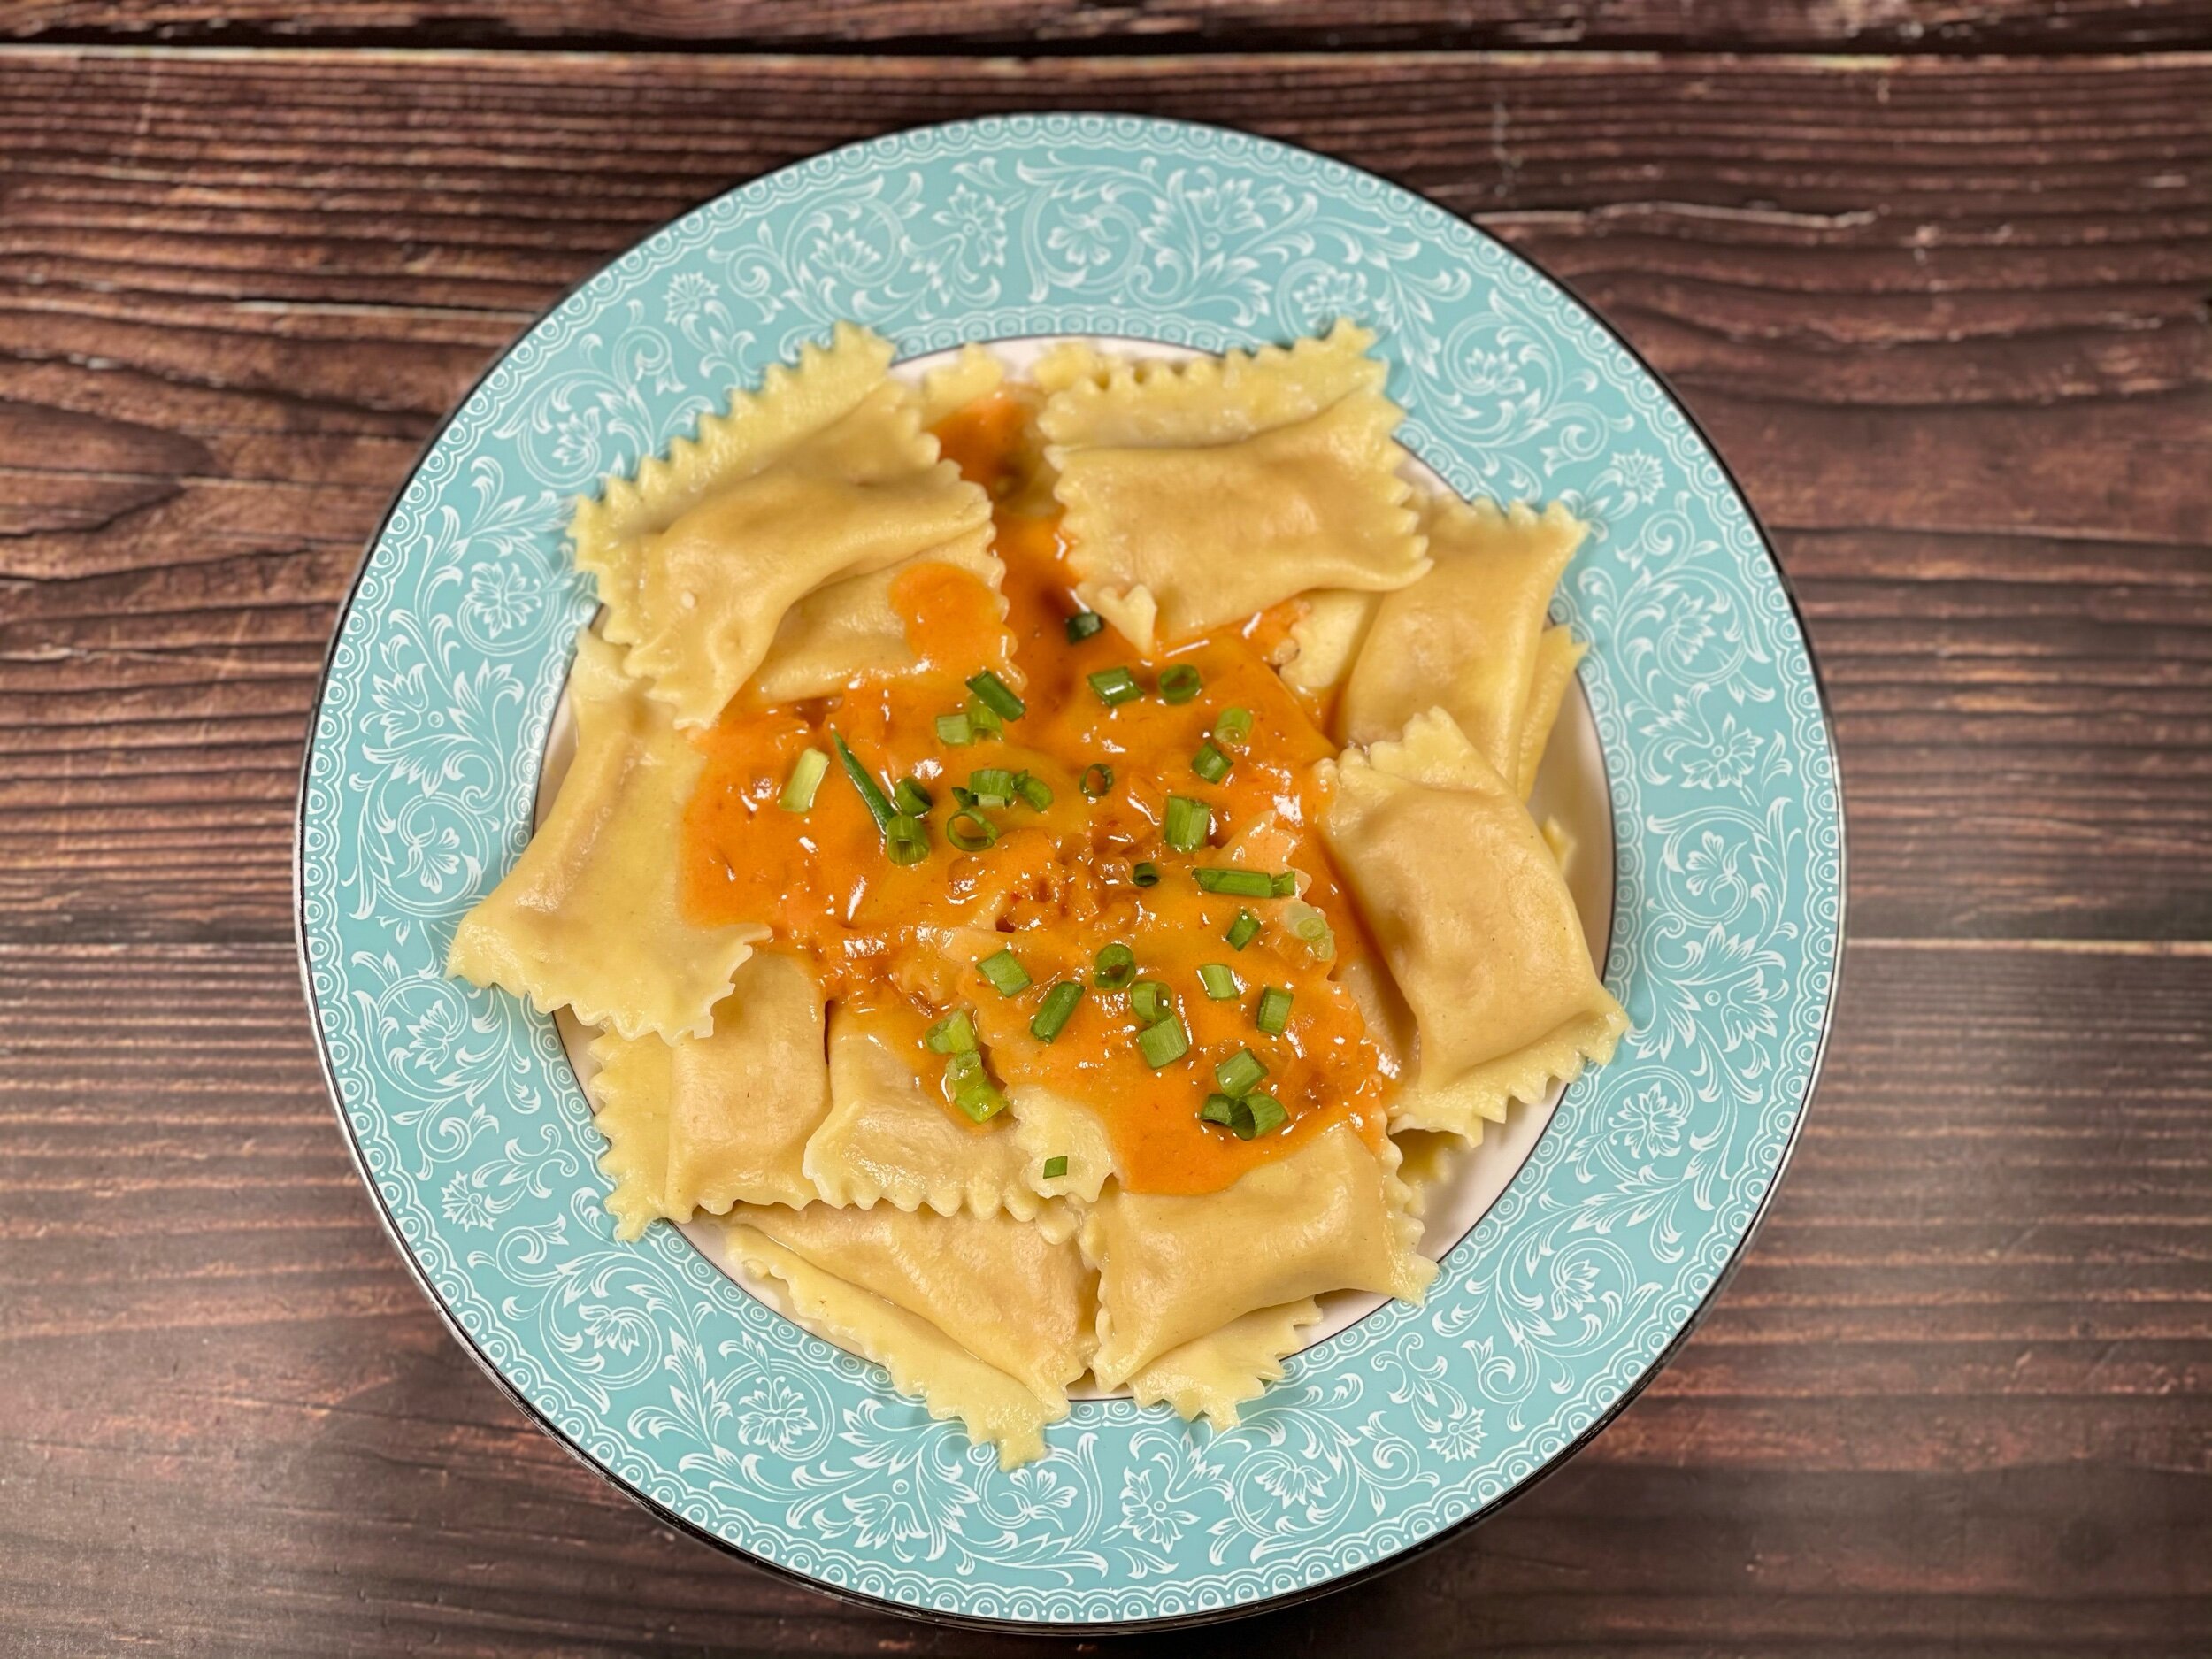
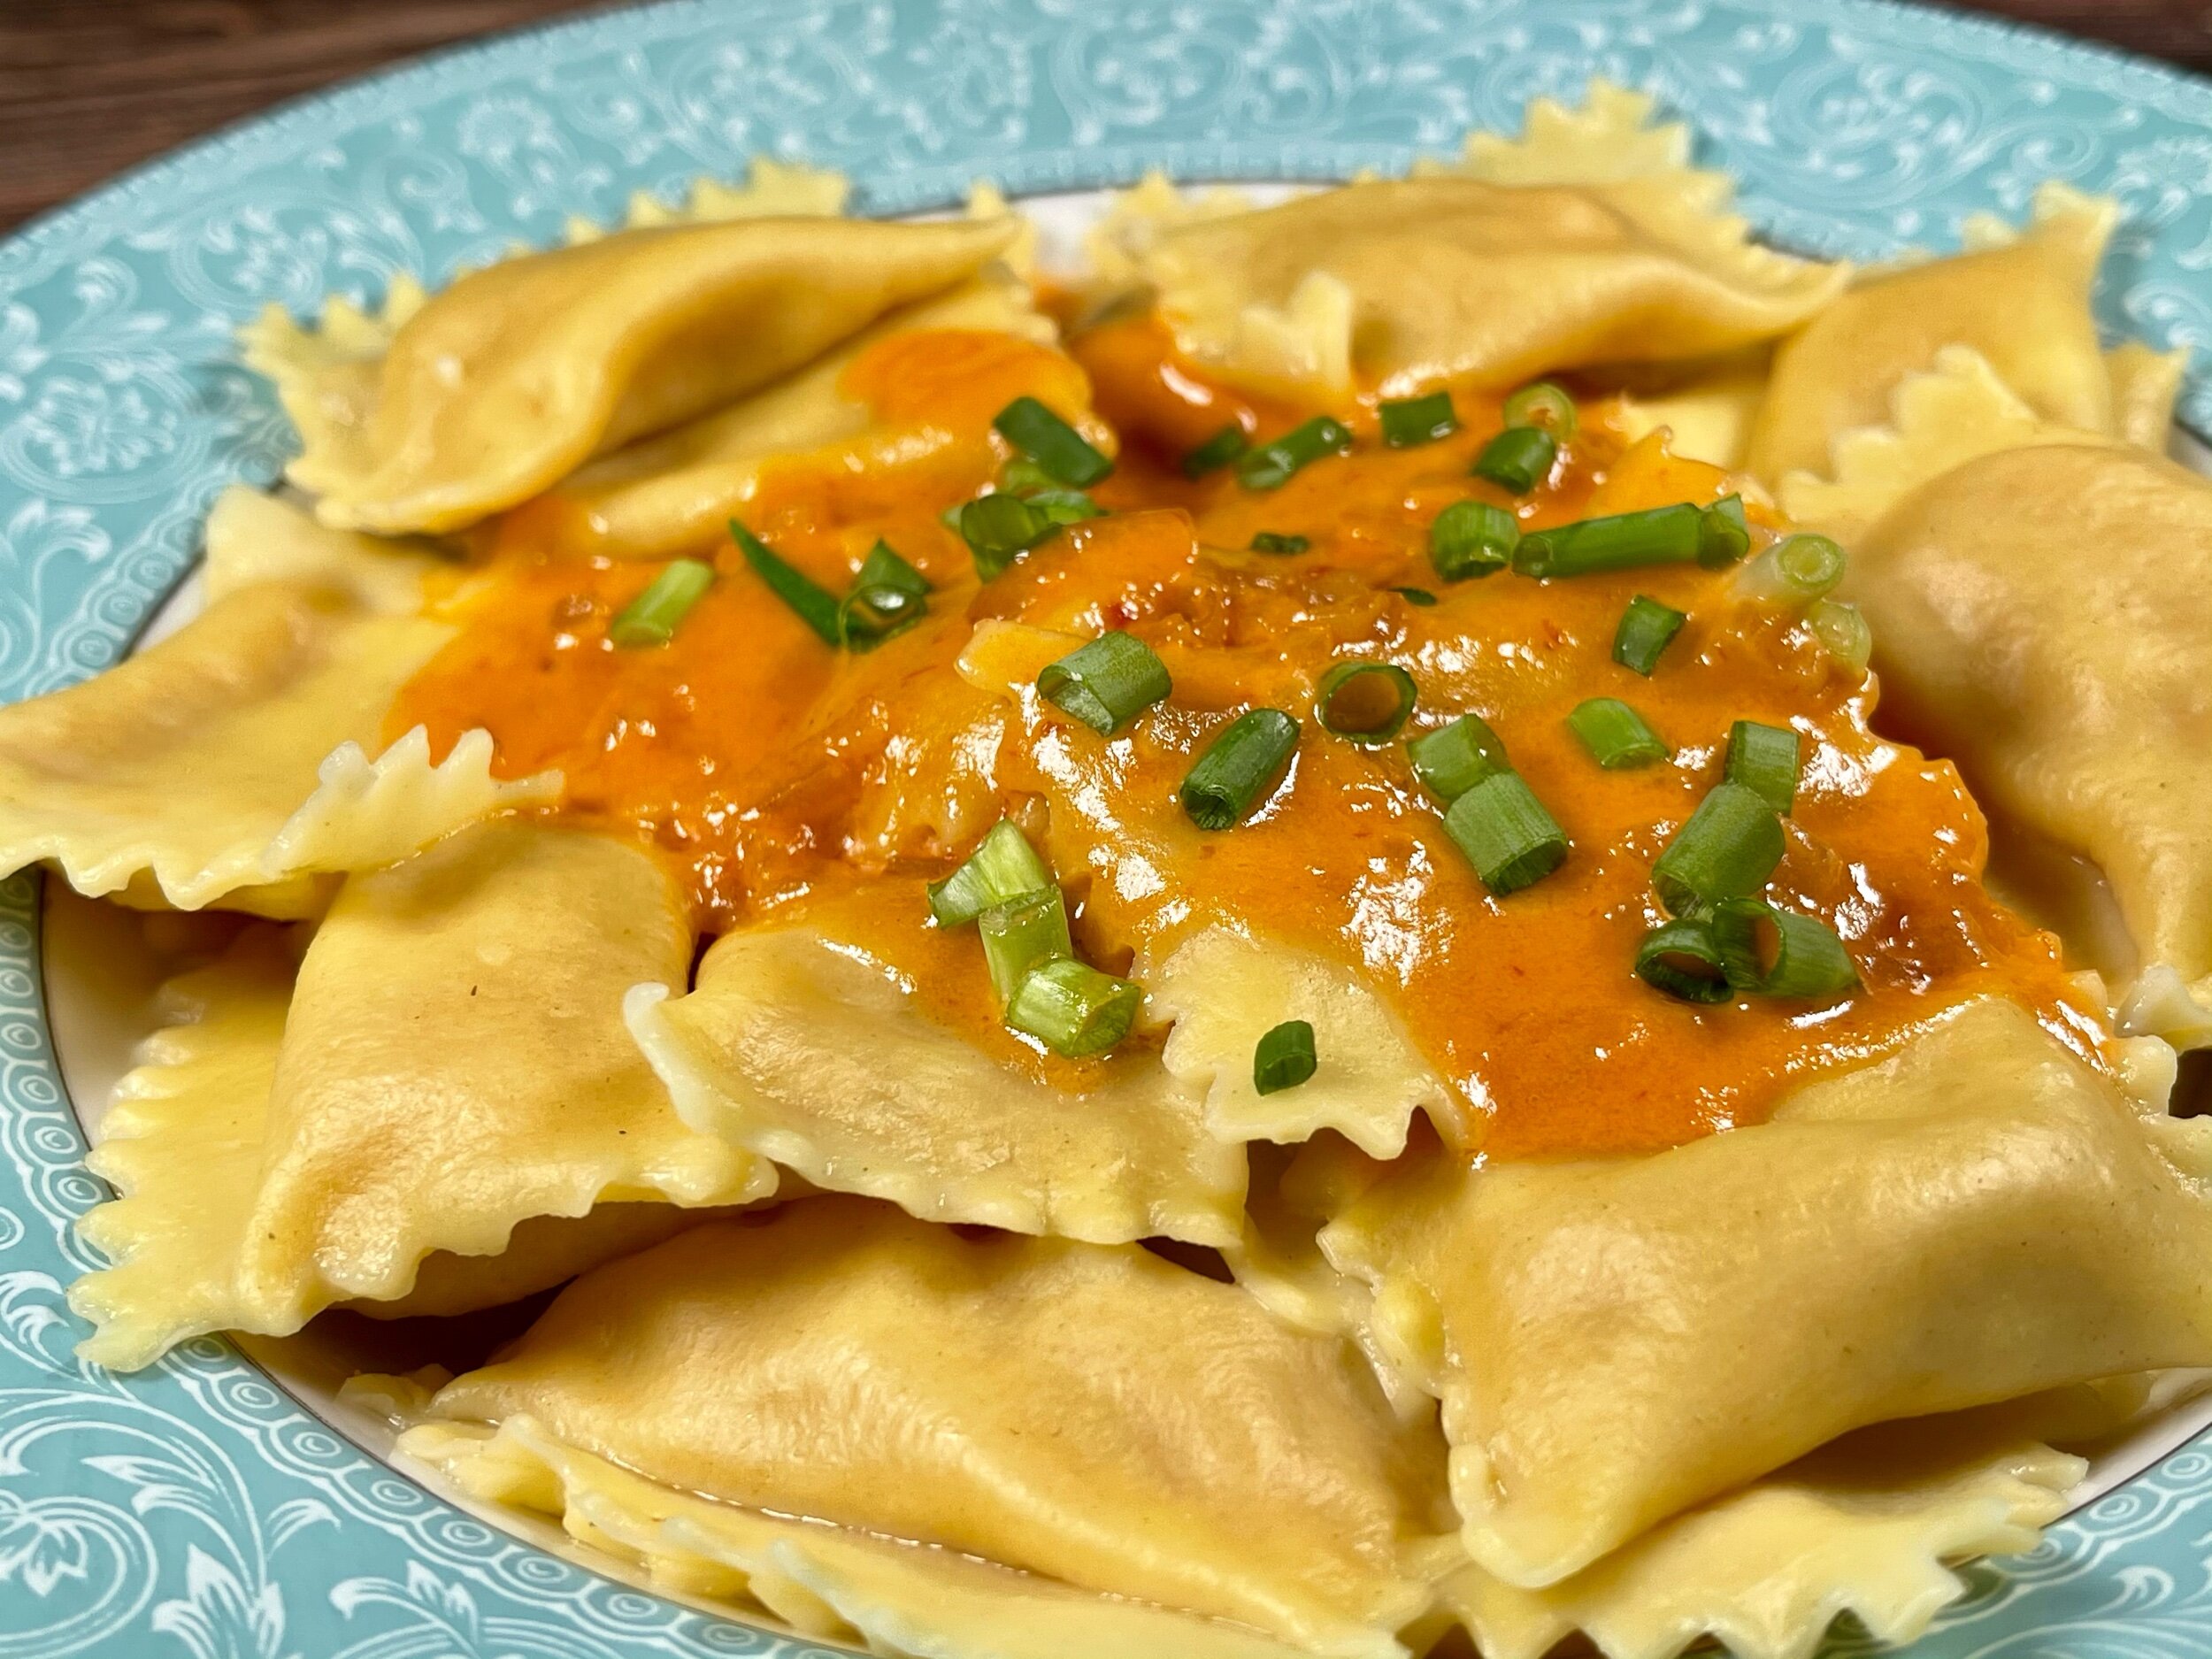
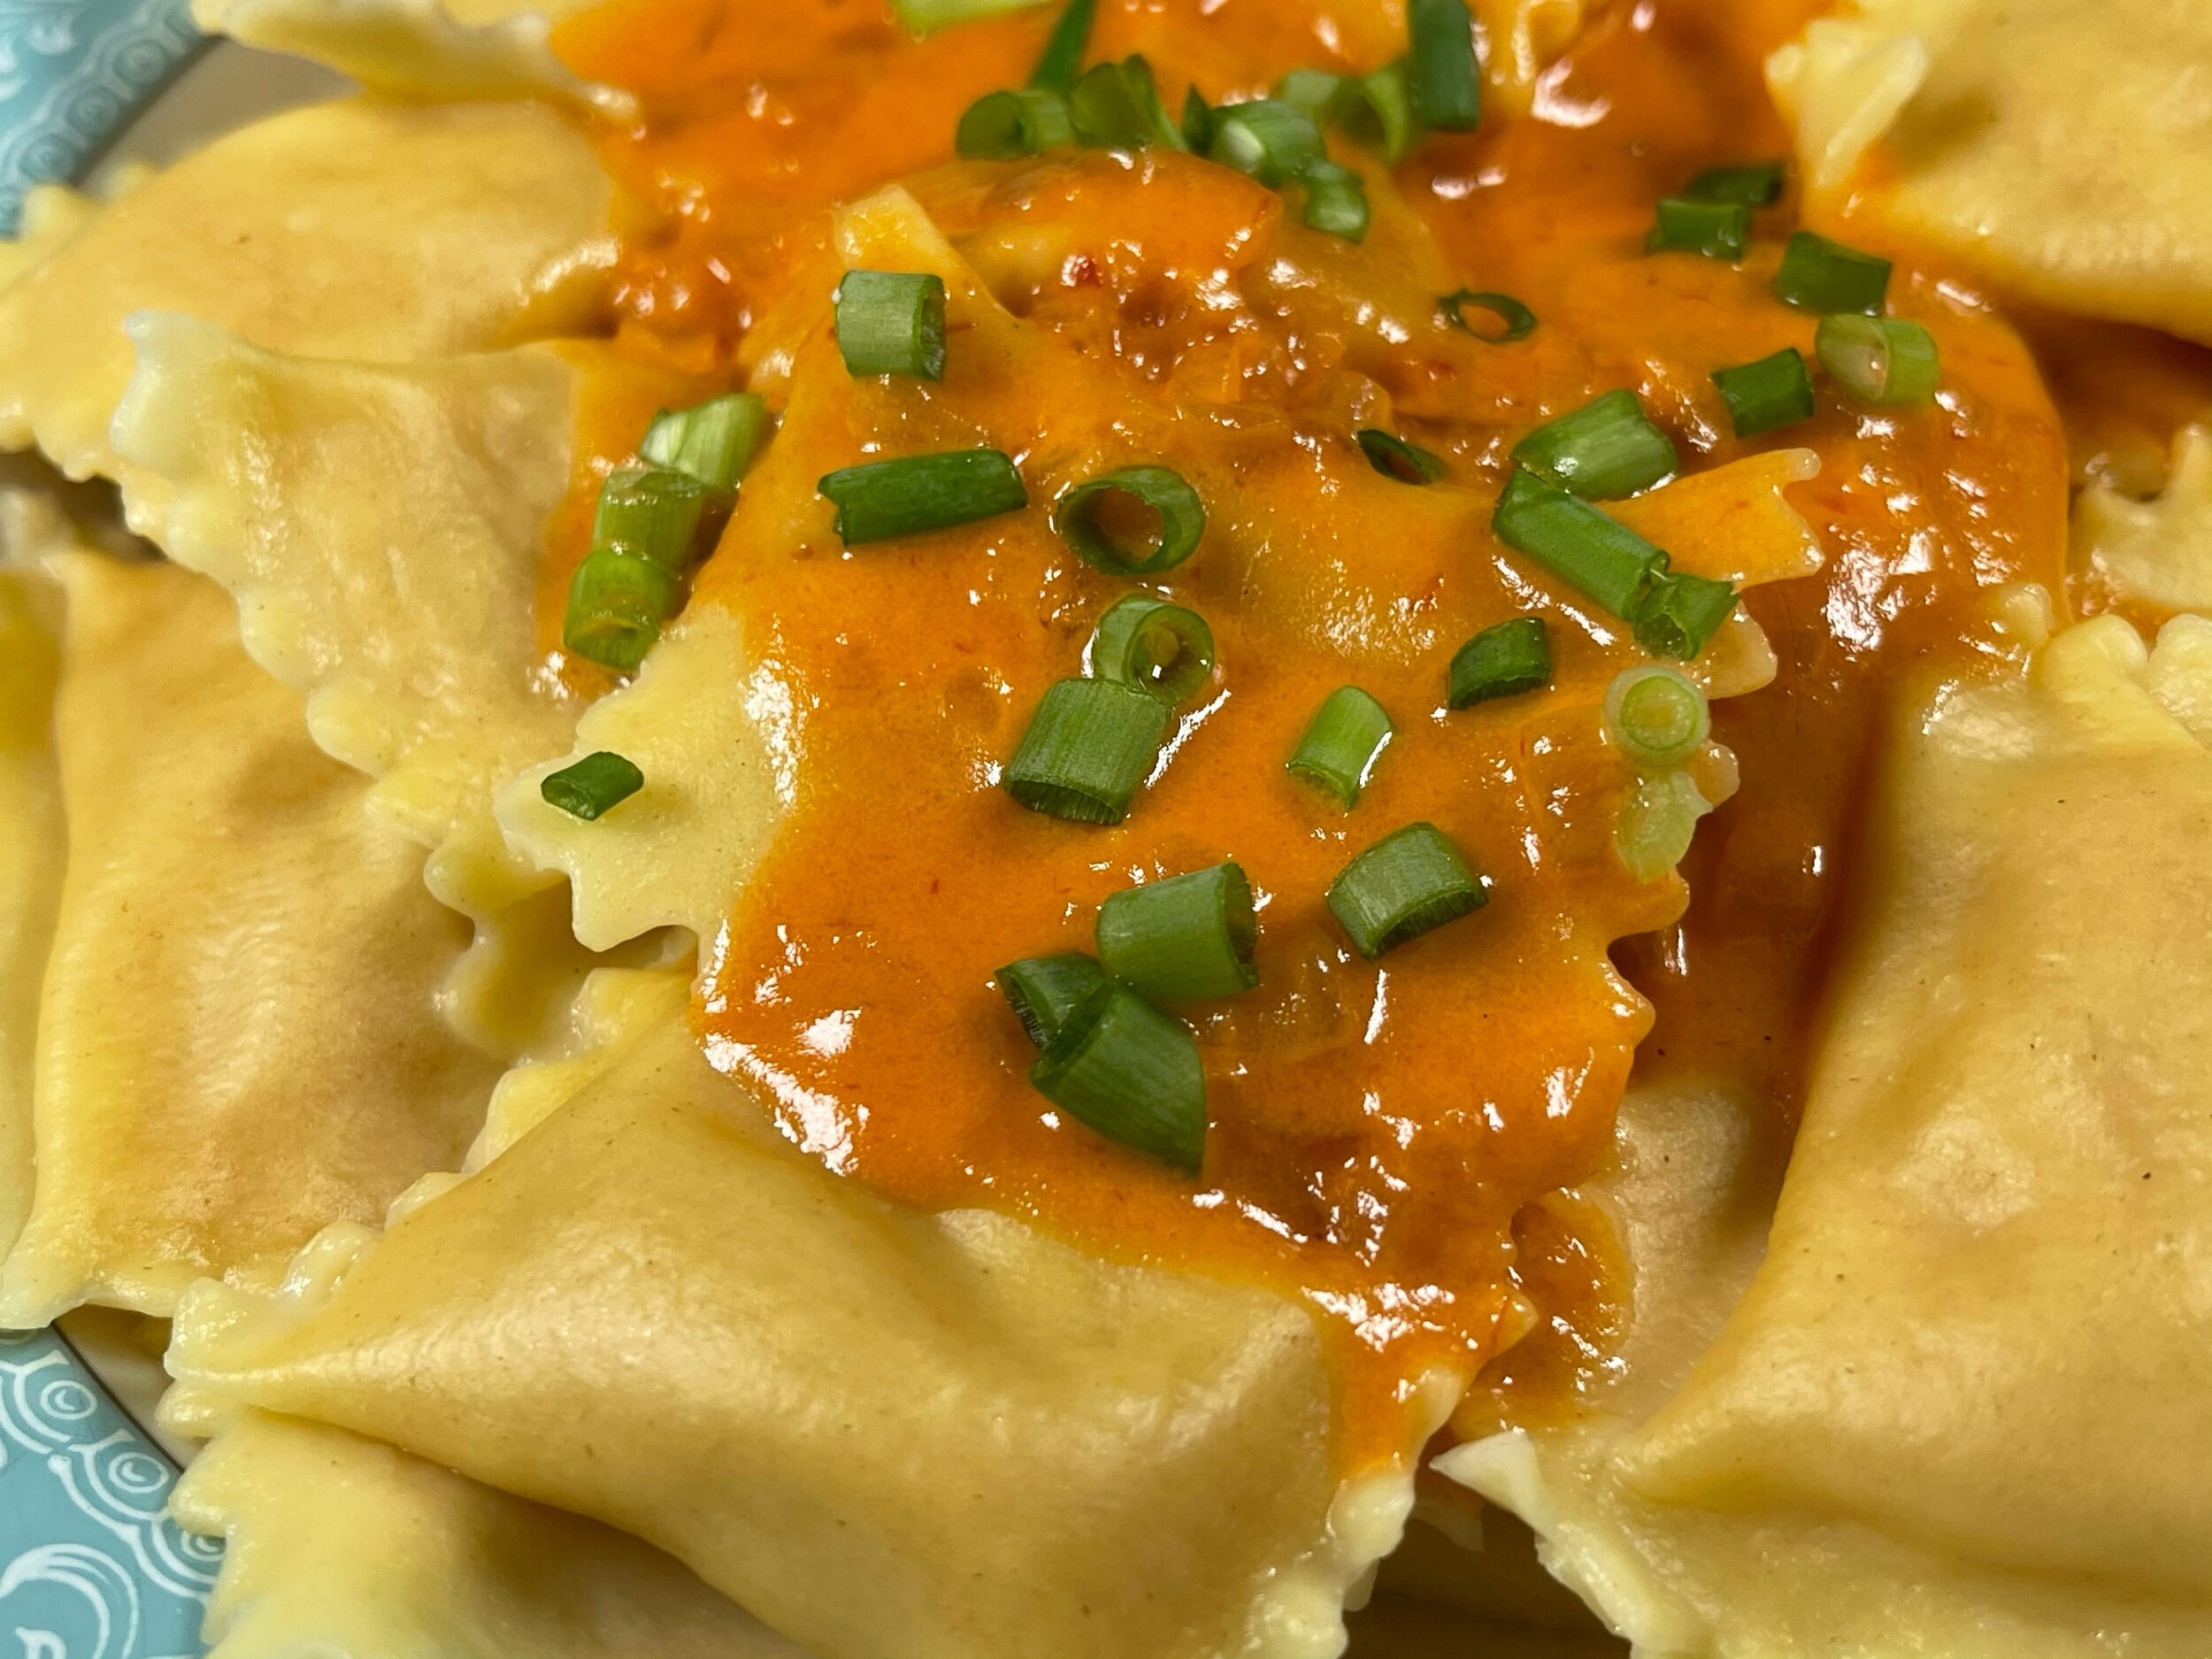
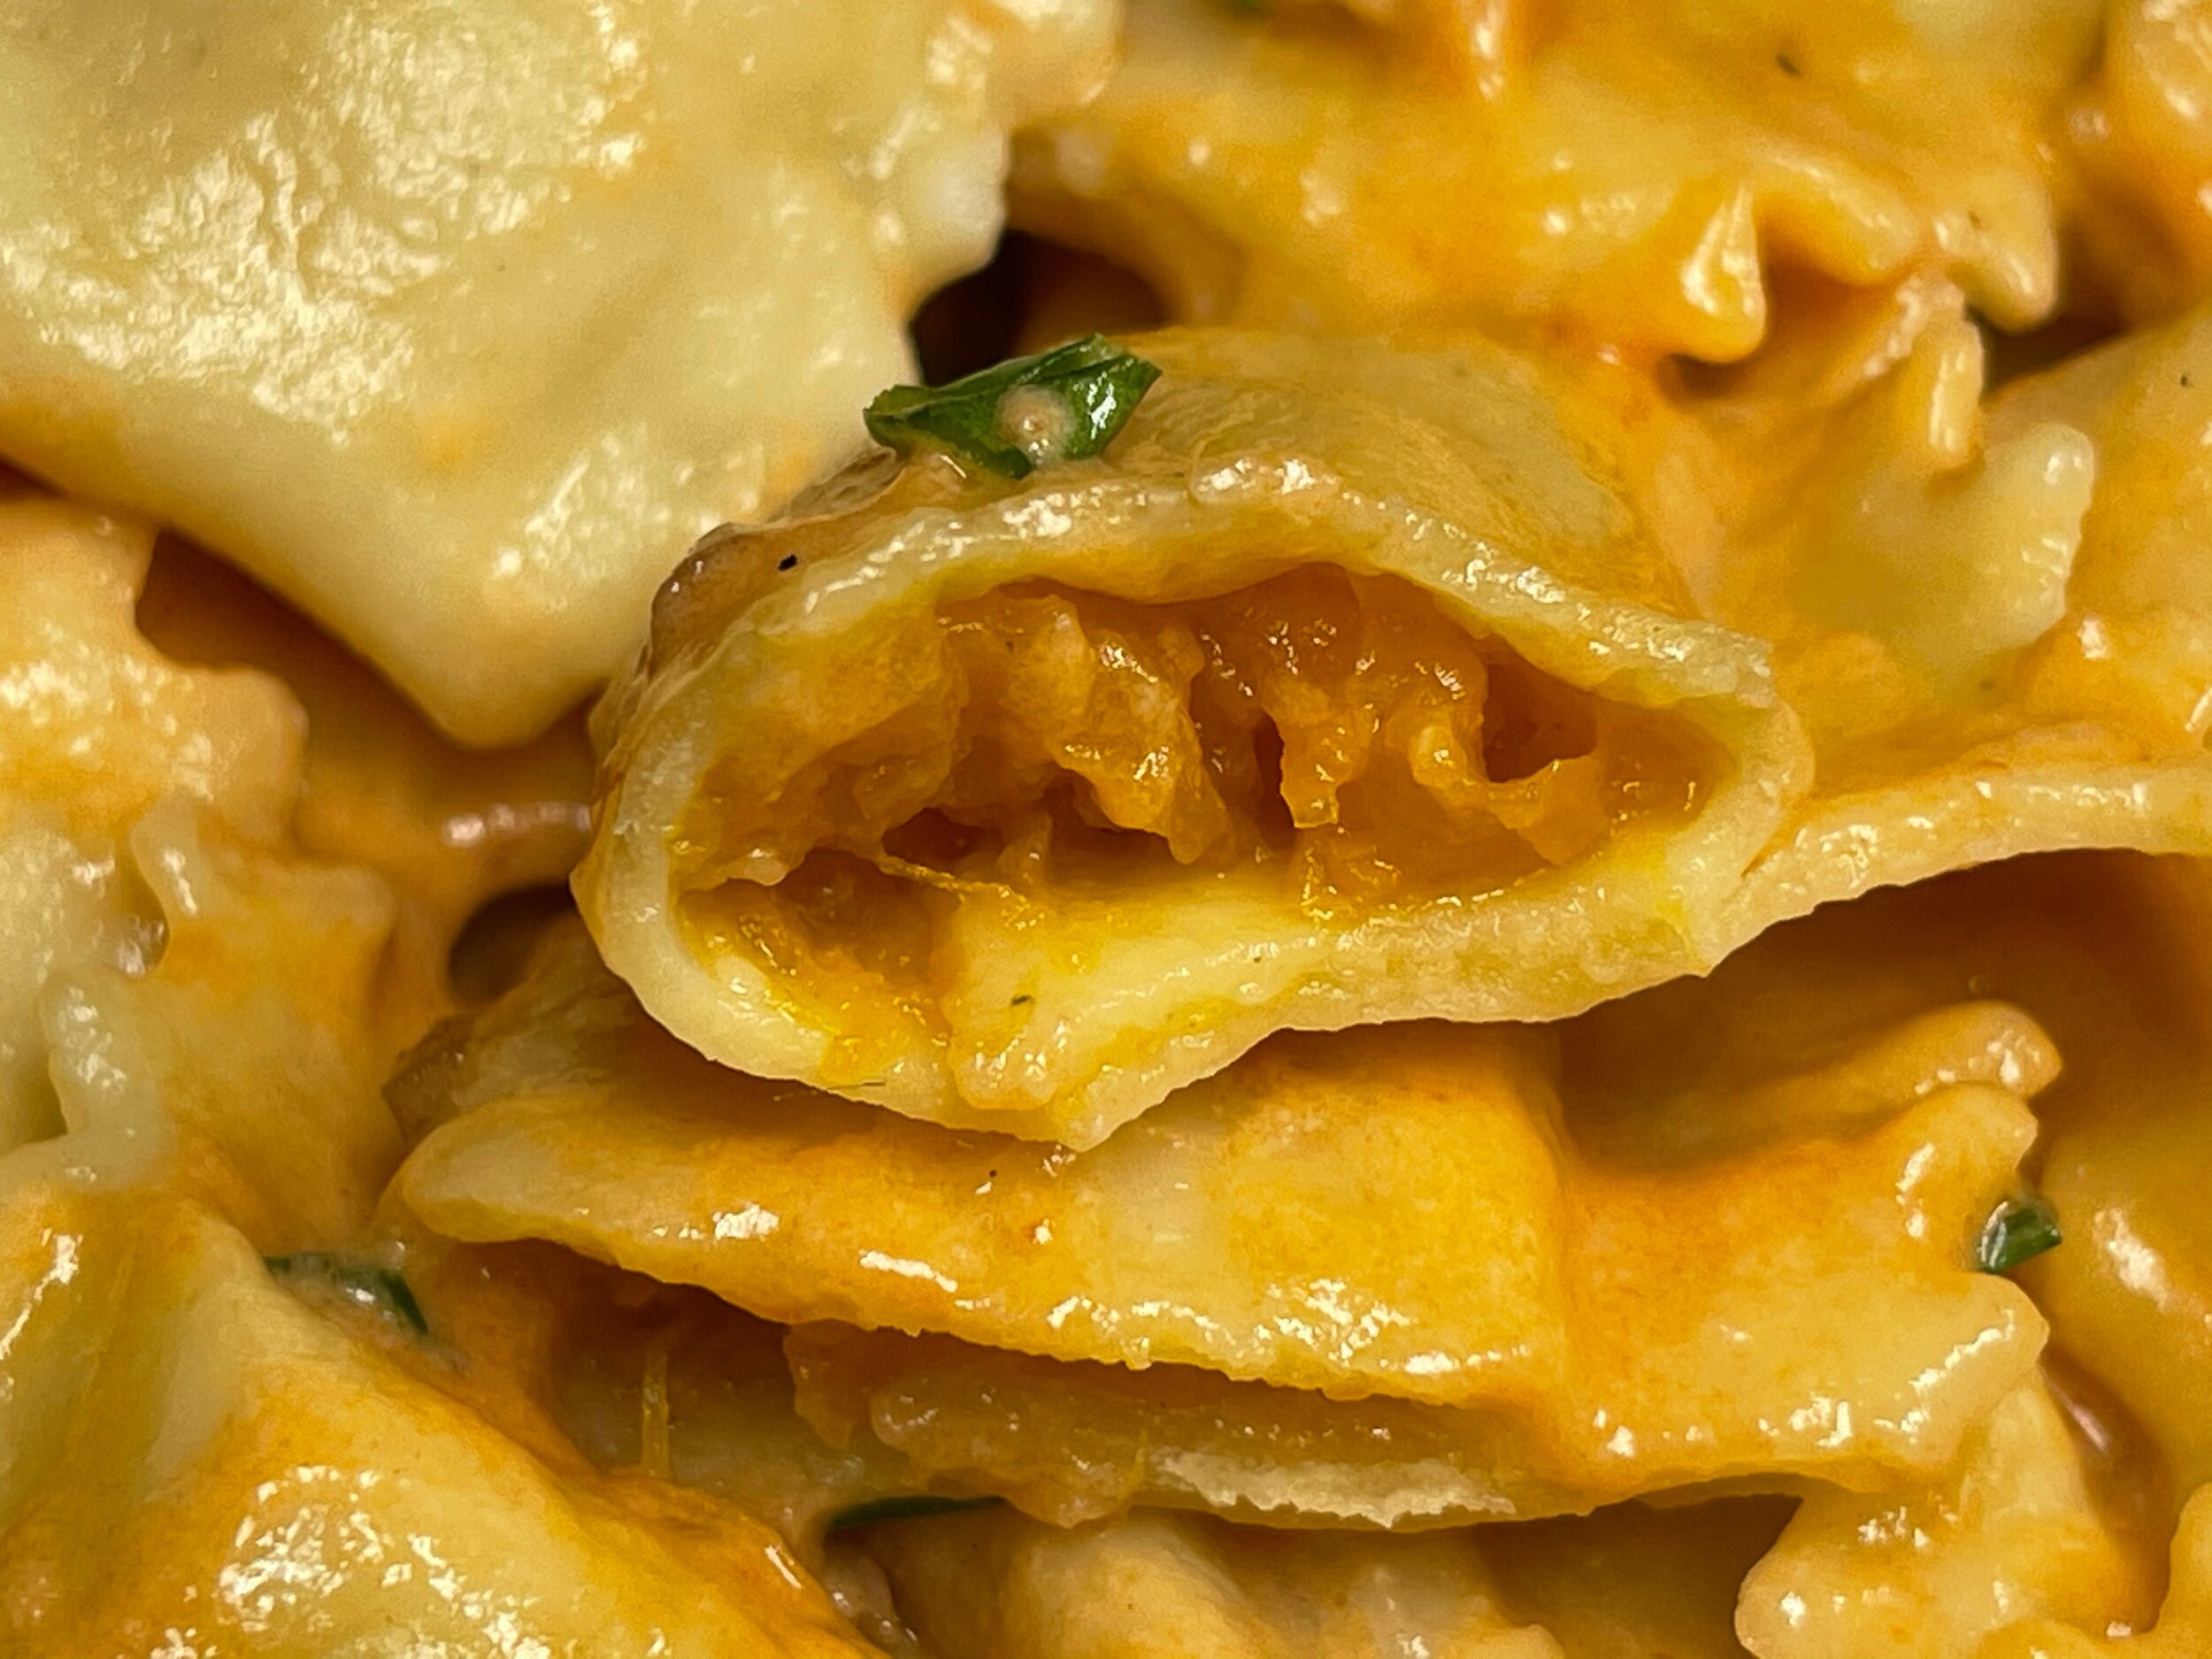
Butternut Squash Agnolotti with Sherry Cream Sauce

I love making pasta. If you were invited to my home for “spaghetti and meatballs” you not only would not be having pasta from a box but I would revel in being able to make fresh pasta for more than my small household. The irony of sorts is that I don’t actually enjoy eating pasta all that much except for the occasional nosh of specific shapes. On top of my food allergies, I also have food sensory challenges that have plagued me since childhood. When it comes to pasta I prefer “thinner” shapes like angel hair and spaghetti over linguine and bucatini. Then when it comes to filled pasta, I generally stick to tortellini and tortelloni and really disliked ravioli. Not because of the yummy fillings but because the pasta where it joins is just too thick for my taste.
A little over a year ago I was watching some YouTube videos on laminating pasta with different colored doughs and came across a segment on a “plaid” filled pasta called agnolotti. What immediately caught my eye was how thin she was rolling the dough and I knew I had to try it. The method was also simple in comparison to the labor-intensive tortellini forming that I was used to doing. So, I got to work and immediately fell in “love” with the pasta and it became a go-to in our house.
As with many of my older culinary efforts, I would make a dish on the fly and the family would fall in love with it. However, I would not have written anything down! I can’t tell you how many times that’s happened and while I have gotten close, I was never able to recreate the various recipes. That is exactly what happened with the first butternut squash-filled agnolotti that I topped with a sherry cream sauce. It wasn’t the pasta that was the issue, but the sauce. I have since made the sauce many times for various dishes but it has never quite been the same, I finally stumbled on a different variation that the family enjoyed. Best of all? I actually wrote it down and weighed ingredients along the way making it easy to replicate.
As for the pasta itself, it can seem a bit daunting if you have never filled your own pasta before, but the end result is well worth it. I use a pasta roller attachment for my KitchenAid stand mixer but, they also have manual pasta machines that you can get at places like Marshalls and Home Goods, etc.. that are relatively inexpensive. However, if you are willing to use a bit more elbow grease and patience, you can hand-roll the pasta as well. I realized that the instructions below could be a bit overwhelming, so I created a step-by-step tutorial of sorts to assemble the pasta which you can find here. My suggestion? Double or triple the recipe to have for future use! Then you can freeze the agnolotti and make them any time you wish for a very quick meal. To freeze them, lay them out on a baking sheet and put them in the freezer. When they are frozen throughout, put them into a freezer bag or a vacuum-sealed bag and store them in the freezer. To cook, bring water to a boil and toss in the frozen pasta and cook until they all float in the water.
I hope you enjoy the delicious pasta recipe! Maybe it will become a favorite for your family like it did mine.
Recipe Card
Note: I highly suggest having a digital scale in your kitchen. It takes the guesswork out and makes baking recipes a lot more successful. All of my recipes are written in metric weights. If you do not have a scale and need to convert a recipe or ingredient to volume, you can use the buttons to the right and copy /paste the recipe into the handy recipe conversion tool or the single ingredient conversion.

Butternut Squash Filled "Lazy" Agnolotti with a Sherry Cream Sauce
Ingredients
Method
- Preheat the oven to 400℉
- Slice off each end of the butternut squash and then slice it in half lengthwise. Scoop out the seeds.
- Brush the exposed flesh with a little olive oil and sprinkle with a little kosher salt.
- Place the squash cut side down onto a baking sheet (I like to line it with aluminum foil as it makes for easier clean-up) and roast in the oven for 45 mins to 1 hour. It should easily pierce with a fork when done.
- Remove from oven and allow to cool for 5 minutes.
- Scoop the flesh from its skin and place it into a blender or a bowl if using a submersion blender.
- Pulse 5 times to break up the squash taking care not to over-process. It is ok for some lumps to remain.
- Pour squash into a sieve/colander and set it over a bowl to allow any extra liquid to drain out as you prep the pasta dough.
- When you are ready to use the filling, stir in the vinegar and season with salt and pepper to taste.
- Place the mixture into a piping bag with a large 1/4" round tip or in a ziplock bag and clip off the corner to make a 1/4" diameter hole.
- Mix the flours together so they are thoroughly combined
- Pour the flour onto your work surface or a very large bowl.
- Create a wide well in the center of the flour and crack the eggs into it.
- Whisk the eggs with the fork (alternatively, you can whisk them in another container and pour in the prepared eggs instead.) until they are well combined.
- Continue to whisk the eggs with the fork and slowly allow the flour to become mixed in.
- As you proceed more and more flour will get pulled in until you have a workable dough.
- Once you have the workable dough, begin to knead it with any remaining flour until you have a stiff dough.
- Let the dough rest for 5 minutes to allow the eggs to hydrate the flour and relax the dough a bit.
- After it has rested, knead the dough for about 7-10 minutes to build up the gluten structure and it is smooth and elastic.
- Cover the dough fully with plastic wrap or place it in a zip lock bag and set it aside for at least 20 minutes before using.
- Divide the pasta into 4-6 portions*
- Dust your countertop liberally with flour. Take one portion of the dough, leaving the others under the plastic wrap, and press it into a flattened oval with your hands.
- Dust the portion lightly with flour and run it through the pasta roller's widest setting. Then fold the dough into 3 folds like you would fold a letter. Run it through the rollers again with the folded edge perpendicular to the rollers.
- Send the dough strip through the machine, lightly dusting along the way if needed but taking care not to over-flour it and dry the pasta out. Reduce the thickness setting with each pass-through until it is very thin and nearly translucent.*
- Lay the strip of rolled dough on the floured countertop. Spread a bit of flour down the long length of each edge, about 1/2inch wide. Trim off the ends so they are straight.
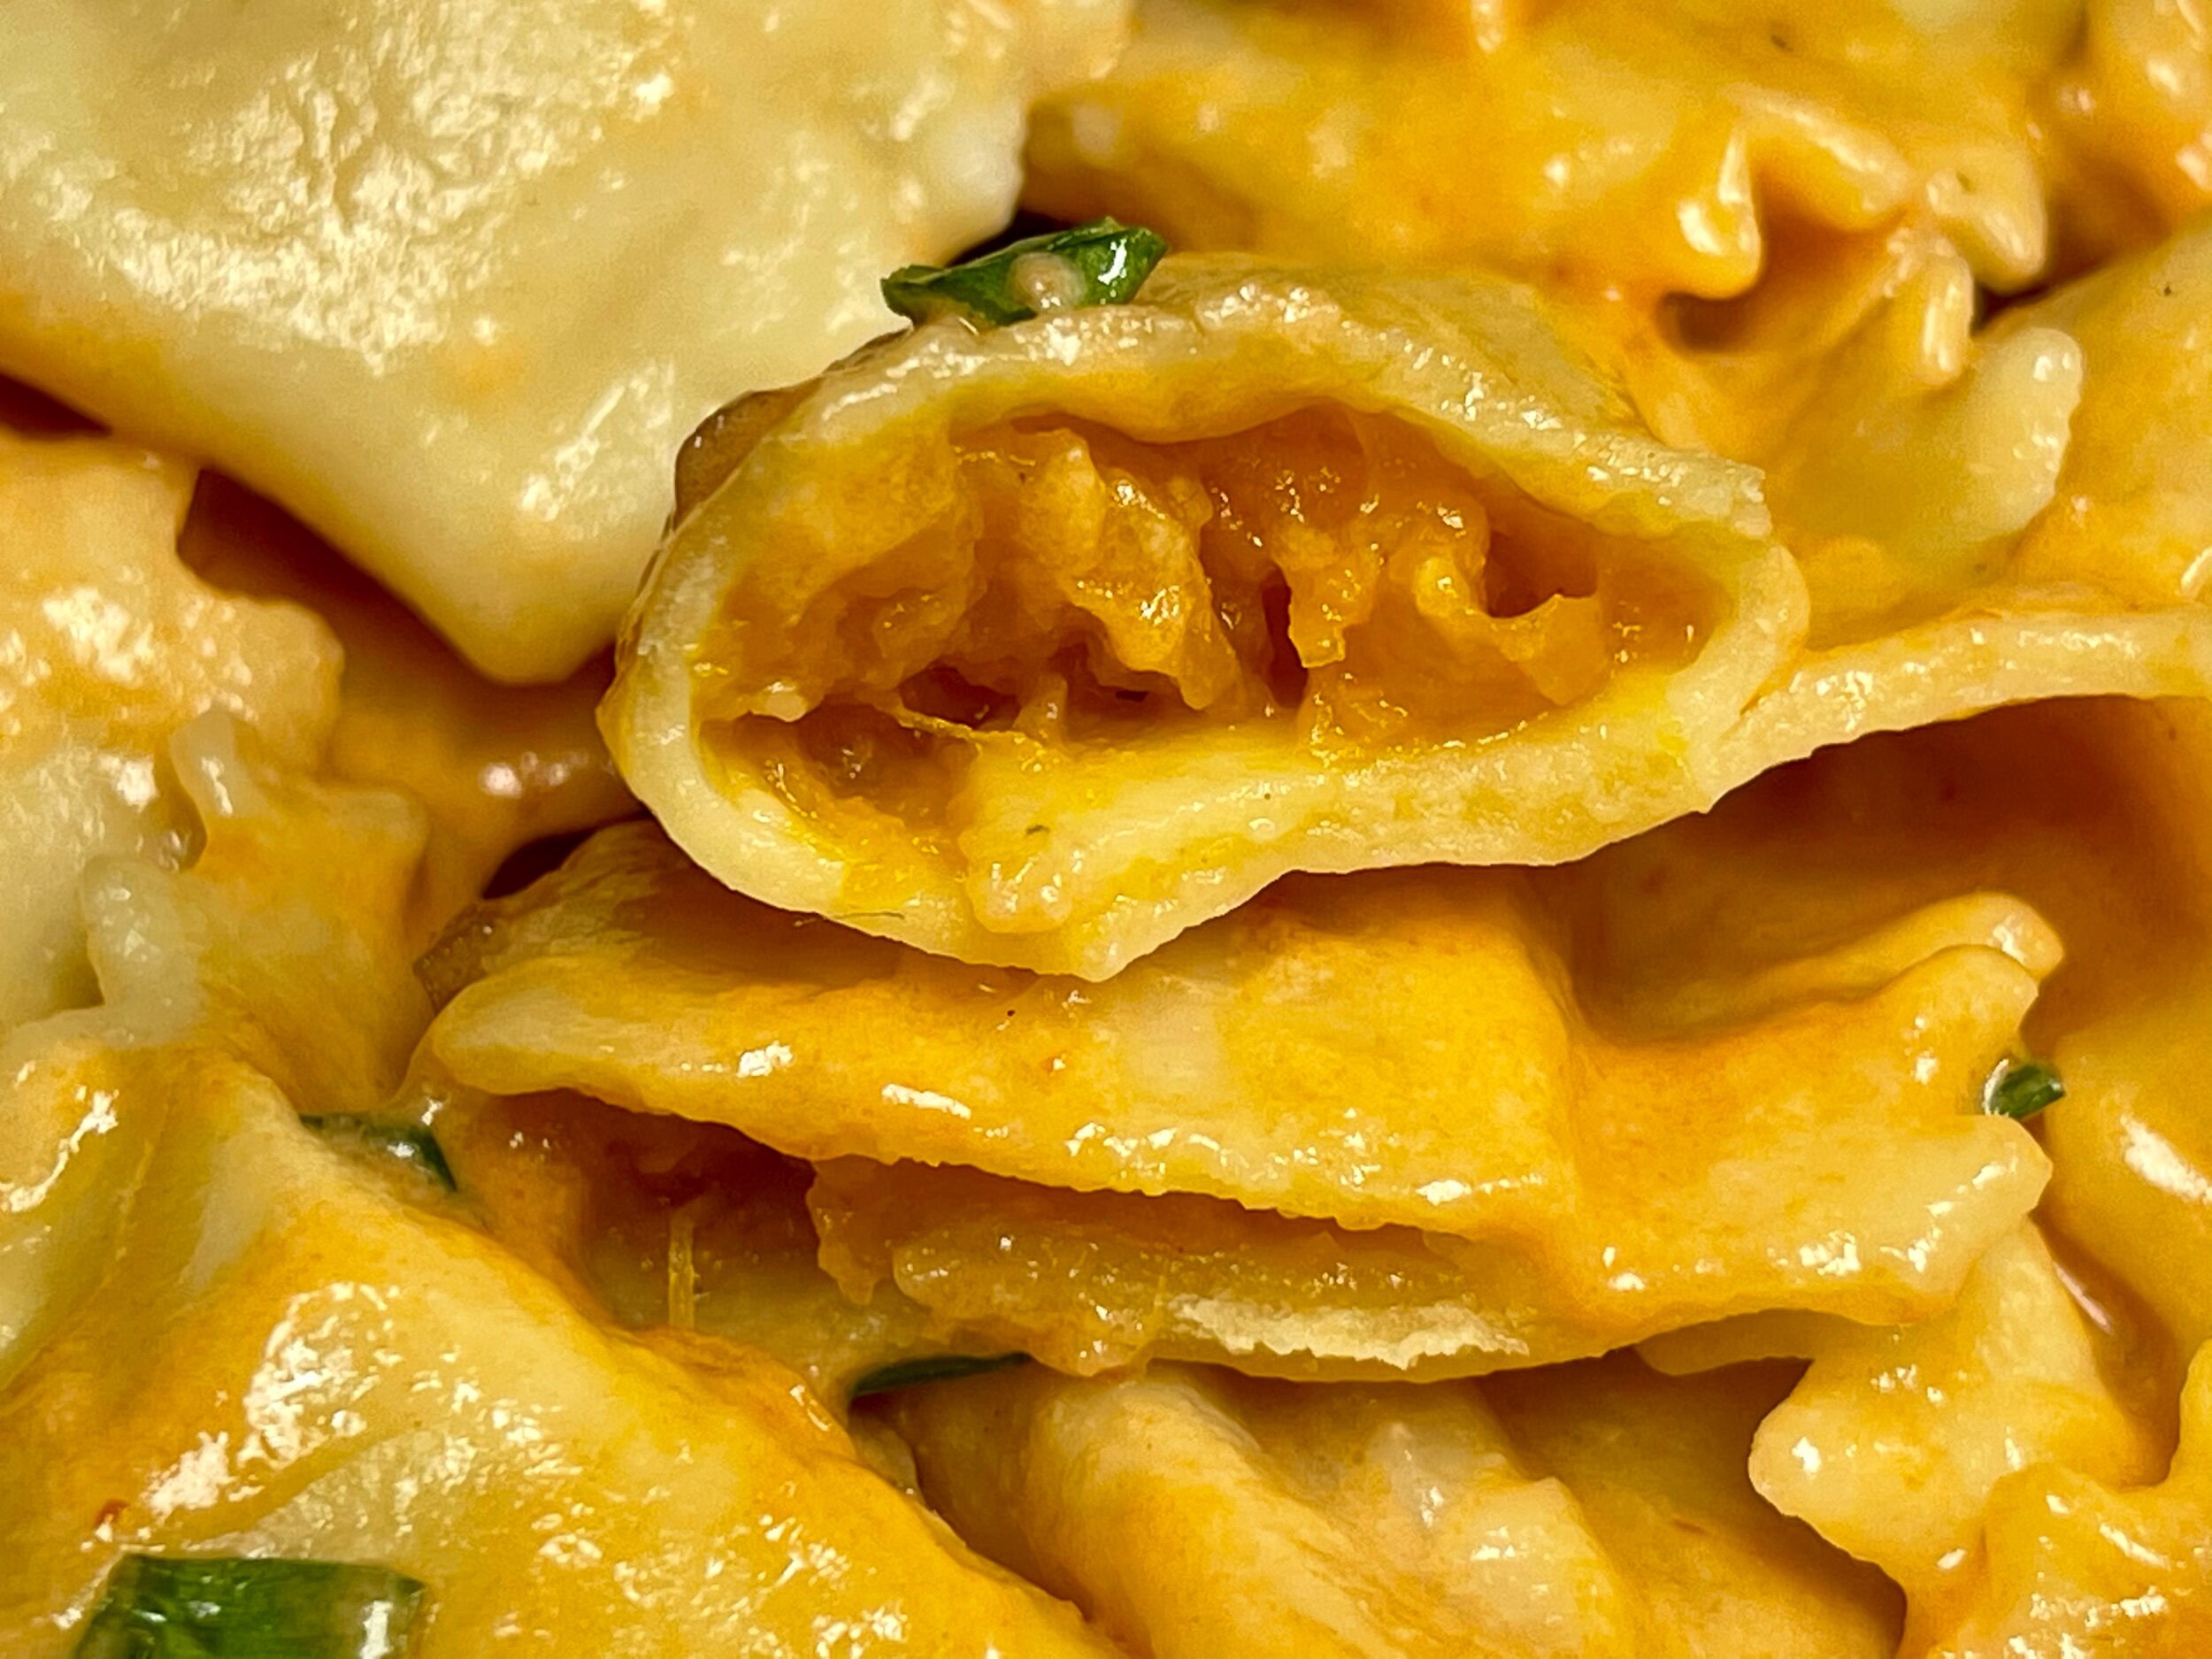
- Starting about 1/2" in, pipe the squash mixture onto the upper flour strip stopping 1" from the end. Repeat on the lower flour strip.
- You should now have the piece of rolled-out dough with 2 strips of butternut squash piped on both edges, down the entire length of the dough.
- Starting with the upper strip, lift the pasta edge and fold it over so the dough covers both sides of the filling. Then, using a pastry brush or a clean finger, brush some water down the length of the dough where it meets the filling strip.
- Then fold the dough/filling strip on top of the water strip, lightly pressing the tube.
- Repeat with the lower edge.
- You should now have what looks like 2 parallel tubes of filled pasta with a plain paste strip separating them.
- Using a dowel the width of your finger (or your finger), starting at one end of the dough strip, place the dowel perpendicular to the dough right before the filling starts. The dowel should cover the width of the dough in order to seal both filling tubes. Press down firmly, rolling the dowel back and forth a little to create a 1/2" wide seal. Then move down the strip 1 inch and repeat pressing the dowel down. You now should have 2 sealed "pillows," from the upper and lower strip.
- Move the dowel down another inch and continue sealing 1" sections down the length of the pasta sheet.
- Finally to cut out and separate the individual agnolotti, take a fluted pasta roller or pizza cutter, and roll the 1/2" seams between each duo of filled pasta. Then run the cutter down the length of the pasta strip between the pillows to separate the upper from the lower agnolotti.
- To cook, bring a large pot of water to a rapid boil. Add the filled pasta and boil for 1-2 minutes until agnolotti are floating and heated throughout.
- Combine the cream and milk and add tomato paste. Whisk it with a fork to break up the paste and distribute it throughout the cream and set aside.
- Heat a splash of olive oil in a saute pan on medium-high heat and add shallots.
- Saute shallots until they are translucent and just starting to brown.
- Add the sherry and allow to cook and reduce for 3-4 minutes.
- Slowly add the cream mixture, whisking as you pour.
- Cook for another 3-4 minutes as the mixture thickens to desired consistency.
- Season with salt and pepper and serve on top of agnolotti.
* Notes (if you see an * please check here)
- You can use all-purpose flour if needed
- The dividing of the pasta dough depends on the space you have to work with. If you have long countertop space you can separate it into fewer portions and make strips of dough several feet long. Separating the dough into 6 portions will give you strips toughly 2 feet long to work with.
- I use a roller attachment on my KitchenAid stand mixer and roll it to the #8 setting.
- For a visual tutorial on filling forming the pasta, you can find it here.